Posts mit dem Label vanilla werden angezeigt. Alle Posts anzeigen
Posts mit dem Label vanilla werden angezeigt. Alle Posts anzeigen
2013/12/05
The 12 days of Christmas Cookies: Day 3 - Vanillekipferl
I know, I know, I skipped a day. Believe me, that wasn't the last time this is gonna happen. Last night was due to laptop issues, though, meaning I give that thing another couple of weeks at most and then it's off to the trash bin. So instead of giving myself a shiny new lens for my DSLR for Christmas, as planned, I'm probably gonna have to give myself a laptop that'll set me back more than twice as much. Great. Merry Christmas to me.
Plus, we have a big storm coming in today (apparently the worst one since 1962), so my bosses told everybody to stay home from work just to be safe, so cross your fingers for me that everybody's completely exaggerating and it won't turn out as bad as the weather service says it will.
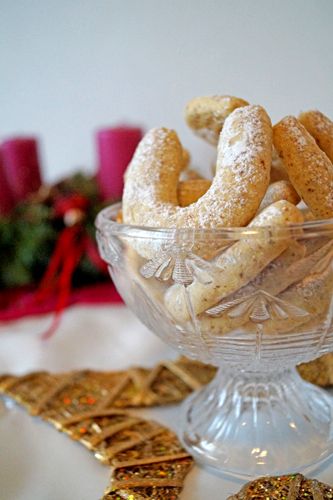
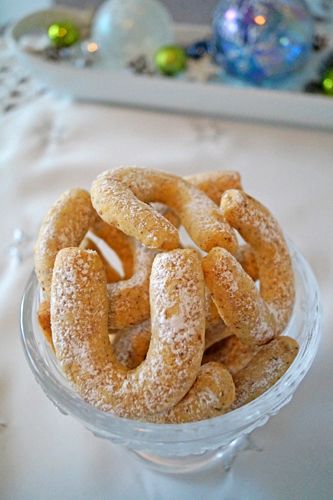
Anyway. On to better things. Vanillekipferl, for example. These are typical German Christmas cookies and no matter how often I make them, they will never not be delicious. You can taste the vanilla bean (Really, don't use a substitute on these, use the real thing. You'll thank me later.) and the powdered sugar gives them just the right sweetness. Mine always turn out huge (just as any other type of cookie I attempt), so the original recipe says it's for 140 cookies and I always end up with about...80 maybe? So plan accordingly. If you're completely capable of forming small cookies and you don't want to end up with 140, then maybe divide the recipe by half.
Vanillekipferl
300g all-purpose flour
140g white sugar
a pinch of salt
4 egg yolks
1 vanilla bean (scrape out the insides and discard the bean)
300g almond meal
300g softened butter
powdered sugar for dusting
1. Sift the flour onto your workspace (I usually work right on my kitchen counter) and make a hole in the middle of the flour. The sugar, salt, egg yolks and the vanilla bean paste go in there.
2. Evenly distribute the almond meal on the side of the flour as well as the butter, cut into small pieces. (Yes, it's a lot of butter. Yes, it's probably gonna cover the outside of your flour volcano almost completely when you're done. That's fine.)
3. With your hands, start kneading everything until you have a smooth dough. At first, it might seem like it won't come together and the egg yolk will stick more to your hands than to the dough, but after about 5 minutes, you should have a really workable dough.
4. Divide the dough into 4 parts and form 4 logs, about 4cm in diameter. Cover them in clingwrap (individually) and put them in the fridge for at least half an hour (an hour's better, though).
5. Line your baking trays with baking paper and preheat your oven to 200°C.
6. Take one of the logs out of the fridge and cut it into slices about a centimetre wide. Roll each slice into a small log (make sure the ends of the log are about as thick as the middle part of the cookies will burn on the sides) and then form a U-shape.
7. Bake for about 10 to 15 minutes (depending on how big your cookies turned out). The cookies aren't supposed to turn brown, so keep a close eye on them!
8. Once they've cooled down, dust with powdered sugar.
Enjoy!
♥ Nicole
2013/09/10
Viennese Whirls
Just once when I go into my kitchen, I'd like things to go completely according to plan from start to finish. Really, just once. I'm not greedy. I have no idea how other people do it. I just know I seem to be completely incapable of producing something edible without some kind of drama while making it. Seriously, I know no one who has as much go wrong in the kitchen as I do all the time. What’s up with that?
Enter these littledrunk soldiers beauties. I saw the recipe a few weeks ago here and they immediately ended up on my "try asap" list. I've been looking for an excuse a reason to make them ever since. Fortunately, it's September. And September means a sh*t-ton of my friends have birthdays. Excuse found. Especially since I saw the friends I made them for only before their actual birthdays, so for obvious superstitious luck reasons, I couldn't make them cakes, so the cookies were perfect.
I’m pretty sure the moment I had that thought, Mr. Murphy was already rubbing his hands in anticipation. It all started out innocent enough, though. The recipe looked easy. I did everything it asked (which wasn't a lot), only when my dough was done, it looked nothing like it did in the original recipe, but it still looked alright-ish. So I decided to give it a try anyway and stuck it in my fancy new cookie press that I'd been dying to try out for a while. End result? Each cookie got stuck on the press and there was no way to get it off without completely squishing it to death. Seems like I had to modify the dough a little. I added more flour until it roughly seemed to resemble the dough in the original recipe. Put it back in the press, tried again - didn't really detach from the press either, but now if you tried, the cookie just fell completely apart and instead of a beautiful little flower, I had five separate petals.
I admit, by then, I was already pretty fed up, but I had to find a way to get the stupid cookies on the baking tray, so I ended up piping them with one of my real old piping tips (that is actually for making little dough baskets to be filled). Now at least they ended up where they were supposed to, but...well....let's just say "even" and "straight" they weren't. I baked them anyway because I really didn't have the patience to redo them again.
Fortunately, after the incident I call "melting moment-gate", I've learned to actually let cookies with a high flour ratio cool completely on the baking tray before I even look at them, so at least they all turned out alright and didn't fall apart after I took them out of the oven.
But when I started filling them, the problem with them being not very even and straight came back to haunt me. Because they were so lop-sided, they just slipped right back apart when I put them down. So I had to device a clever little plan of propping them all up against each other to try to keep them all mostly straight while the buttercream hardened. Which kind of worked. However, what was supposed to look like some sophisticated little British desert actually looked like a row of drunk soldiers.
So what do you do when your cookies look like drunk soldiers? Exactly, you deflect.
Look at the pretty flowers! And the colorful wrappers. LOOK!!!
Anyway. They tasted really nice, though. Crumbly and sweet and they just melted in your mouth. So let's not dwell on how they looked. At least they were a success taste-wise! And that's all that matters, right?
Viennese Whirls
Recipe adapted from Five Euro Food
For the cookies:
250g soft butter
350g flour
50g icing sugar
1 p. vanilla sugar
For the filling:
100g soft butter
100g icing sugar
1 tsp vanilla extract
5 tbsp jam (original calls for raspberry, I just redcurrant)
Cookies
1. Preheat your oven to 190°C
2. Put all the ingredients for the cookie dough in a bowl and mix with a hand mixer (you don't need a dough hook) until you get a smooth dough (take a bit and roll it to a ball - if it doesn't stick to your hands, it's fine).
3. Try your luck with a cookie press (flower inset). If that doesn't work out for you,welcome to the club put the dough in a piping bag and - using a tip with a large opening (e.g. a big star tip) - pipe circles of about 3cm in diameter on a baking tray. You only need to leave a little space between the cookies, they'll stay pretty much the size you piped them.
4. Bake for about 12 minutes or until the cookies start to slightly brown at the edges. Let them cool completely before removing them from the baking tray.
Vanilla Buttercream
1. Mix the butter, icing sugar and vanilla extract together using an electric whip until the ingredients are well-combined and the sugar has dissolved.
Assembly
1. Try to always match two cookies that are the same size.
2. Pipe a bit of buttercream on one cookie and a little dollop of jam in the middle of the other (not too much, though, or it will all come out on the sides when you put the cookies together).
3. Press them together slightly.
4. Let the buttercream harden and dust with icing sugar before serving.
Enjoy!
♥ Nicole
Enter these little
I’m pretty sure the moment I had that thought, Mr. Murphy was already rubbing his hands in anticipation. It all started out innocent enough, though. The recipe looked easy. I did everything it asked (which wasn't a lot), only when my dough was done, it looked nothing like it did in the original recipe, but it still looked alright-ish. So I decided to give it a try anyway and stuck it in my fancy new cookie press that I'd been dying to try out for a while. End result? Each cookie got stuck on the press and there was no way to get it off without completely squishing it to death. Seems like I had to modify the dough a little. I added more flour until it roughly seemed to resemble the dough in the original recipe. Put it back in the press, tried again - didn't really detach from the press either, but now if you tried, the cookie just fell completely apart and instead of a beautiful little flower, I had five separate petals.
I admit, by then, I was already pretty fed up, but I had to find a way to get the stupid cookies on the baking tray, so I ended up piping them with one of my real old piping tips (that is actually for making little dough baskets to be filled). Now at least they ended up where they were supposed to, but...well....let's just say "even" and "straight" they weren't. I baked them anyway because I really didn't have the patience to redo them again.
Fortunately, after the incident I call "melting moment-gate", I've learned to actually let cookies with a high flour ratio cool completely on the baking tray before I even look at them, so at least they all turned out alright and didn't fall apart after I took them out of the oven.
But when I started filling them, the problem with them being not very even and straight came back to haunt me. Because they were so lop-sided, they just slipped right back apart when I put them down. So I had to device a clever little plan of propping them all up against each other to try to keep them all mostly straight while the buttercream hardened. Which kind of worked. However, what was supposed to look like some sophisticated little British desert actually looked like a row of drunk soldiers.
So what do you do when your cookies look like drunk soldiers? Exactly, you deflect.
Look at the pretty flowers! And the colorful wrappers. LOOK!!!
Anyway. They tasted really nice, though. Crumbly and sweet and they just melted in your mouth. So let's not dwell on how they looked. At least they were a success taste-wise! And that's all that matters, right?
Viennese Whirls
Recipe adapted from Five Euro Food
For the cookies:
250g soft butter
350g flour
50g icing sugar
1 p. vanilla sugar
For the filling:
100g soft butter
100g icing sugar
1 tsp vanilla extract
5 tbsp jam (original calls for raspberry, I just redcurrant)
Cookies
1. Preheat your oven to 190°C
2. Put all the ingredients for the cookie dough in a bowl and mix with a hand mixer (you don't need a dough hook) until you get a smooth dough (take a bit and roll it to a ball - if it doesn't stick to your hands, it's fine).
3. Try your luck with a cookie press (flower inset). If that doesn't work out for you,
4. Bake for about 12 minutes or until the cookies start to slightly brown at the edges. Let them cool completely before removing them from the baking tray.
Vanilla Buttercream
1. Mix the butter, icing sugar and vanilla extract together using an electric whip until the ingredients are well-combined and the sugar has dissolved.
Assembly
1. Try to always match two cookies that are the same size.
2. Pipe a bit of buttercream on one cookie and a little dollop of jam in the middle of the other (not too much, though, or it will all come out on the sides when you put the cookies together).
3. Press them together slightly.
4. Let the buttercream harden and dust with icing sugar before serving.
Enjoy!
♥ Nicole
2013/06/21
Strawberry Cardinal

I haven't really gotten around to baking something in the past few weeks, because I've been somewhat preoccupied with sewing. Well, and there wasn't really anyone who could've eaten it with me. And I'm on somewhat of a half-assed diet again (and really, when am I not?).
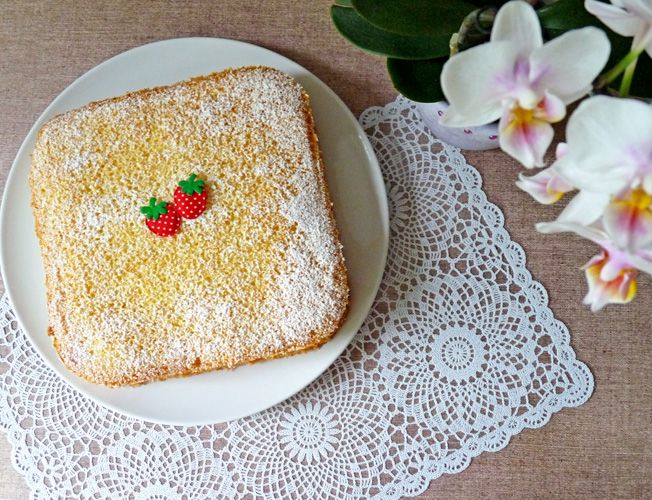
So today I visited my former work place, so I used the chance of knowing there were plenty of people who I could share with (and who usually were very keen on eating my cakes) and finally made something again. I realize it may not look like much, but don't judge a book by its cover (Heh. A publishing pun.)...or in this case, a cake by its outside - it's aaaaall on the inside.
The base and top each are a layer of sponge and a layer of meringue. The bottom layer is soaked in lemon curd and topped with vanilla whipped cream and strawberries. Sound better now?
I have no idea idea why this is called a strawberry cardinal, by the way. Just go with it.
Strawberry Cardinal
For the sponge:
2 eggs plus 4 egg yolks
80g flour
1/2 tsp of baking powder
70g of powdered sugar
For the meringue:
4 egg whites
100g sugar
For the filling
2 tps lemon curd
300-400g of strawberries (well, basically as many as you want to be in there)
250ml vanilla whipped cream (alternatively: whipped cream plus 2 pkg. of vanilla sugar or 1/2 tsp of vanilla extract)
1. Whisk the eggs, egg yolks and the powdered sugar with an electric mixer until they have tripled.
2. Sift the flour and powdered sugar on top and carefully fold in until it's just incorporated.
3. Divide the dough between two 28 or 30cm greased springform pans.
4. Mix the egg whites for a minute, then slowly add the sugar and continue whisking until a fairly firm meringue has formed (it doesn't have to be super stiff, though, or you won't be able to spread it on the dough).
5. Divide the meringue between the two pans, and spread it over the dough.
6. Bake on 150°C for about 20 to 30 minutes.
7. Whip the vanilla whipped cream, cut up the strawberries into small pieces and mix the two.
8. When the cakes are completely cooled, spread a thin layer of lemon curd on the bottom layer, spread the whipped cream on it and put the second cake layer on top.
9. Sprinkle with powdered sugar right before serving. (Or decorate with whipped cream and more strawberries. Basically, be a lot more creative than I was!)
Bon appetit!
♥ Nicole
Abonnieren
Posts (Atom)


