2013/05/29

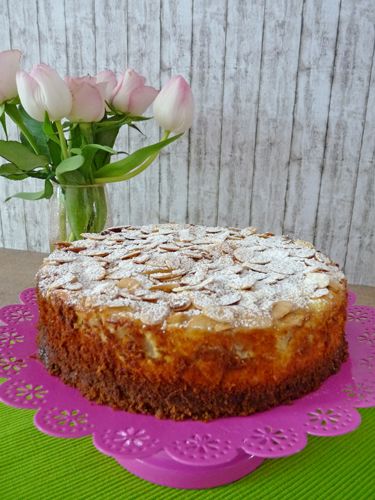
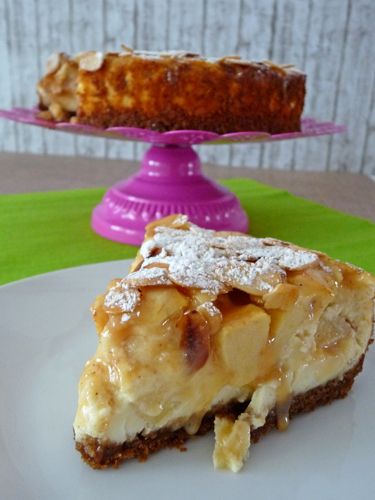
Apple Toffee Cheesecake


I ♥ cheesecake. I might even be a bit obsessed with it. Cheesecakes are easy, they’re versatile and there’s not a whole lot you can actually do wrong with them.

We Germans are actually very uncreative when it comes to cheesecake. Here, cheesecake is usually made out of quark and vanilla pudding, sometimes with a little semolina sprinkled in. If you’re lucky, there’s gonna be some fruit on top. And that’s pretty much it.

So color me surprised when I discovered The Cheesecake Factory the first time I lived in the U.S. First time I had their Dulce de Leche Cheesecake? Serious foodgasm. So ever since, cheesecake has been my go-to-cake. Usually I just throw in whatever I’ve got lying around and don’t measure anything and so far, I’ve never had one not taste good.


Lately, I’ve had a lot of apples leftover at the end of the week and for some reason, they go bad really fast, so I needed a way to use them up this weekend before I was forced to throw them out. Et voilà – the go-to-cheesecake! I actually have a favorite cheesecake recipe with apples and caramel, but since I only had half of the stuff for that here, I improvised a little.
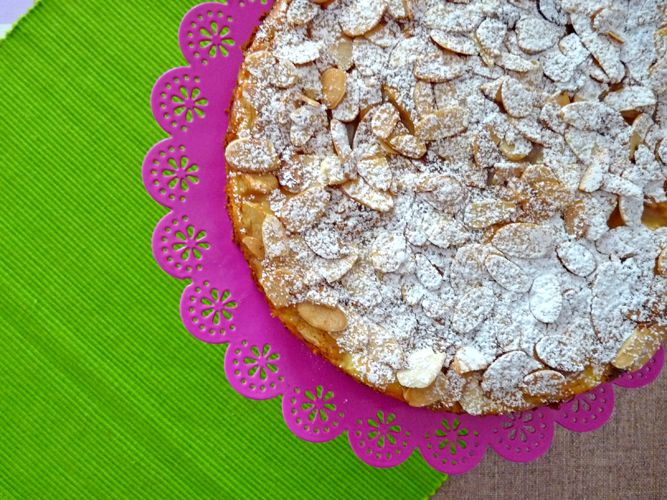


Apple Toffee Cheesecake

Ingredients (for a 24cm spring pan):

100g crushed caramel cookies (or other cookies of your choice)
3-4 tbsp butter
400g cream cheese
3 eggs
2 tbsp sugar
1 tsp vanilla extract
2-3 medium-sized, sweet apples
1 tsp cinnamon
50g slivered almonds
4 tbsp toffee syrup/bread spread or just toffees

1. Line the bottom of a spring pan with parchment paper. Melt the butter and pour over the finely crushed cookies. Mix together with a fork or spoon until the cookie crumbs are moist. [You can check if the crumbs have the right consistency by pressing some to the side of the bowl with the spoon or fork. If they stick, they're fine, if they fall right back down, add a little more butter]. Press the crumbs evenly to the bottom of the spring pan.

2. Put the the cream cheese, eggs, sugar and vanilla extract in bowl and mix until smooth. Pour the batter over the cookie crust.

3. Peel the apples and cut them into smallish pieces of roughly the same size. Sprinkle with cinnamon and distribute them evenly over the batter. Press them slightly down if they don't sink into the batter.

4. Bake on 180°C for 45 minutes.

5. Let the cake cool slightly before pouring the toffee syrup on top [I used toffee bread spread - for the Germans: "Original Muh Muhs Brotaufstrich" - which had to be slightly warmed so it could be poured. If you use toffees, heat them over a bain marie until they melt].

6. Roast the slivered almonds in a pan without using oil or butter. Stir frequently so they don't burn. Scatter on top of the cake and dust with powdered sugar.

Enjoy!

♥ Nicole

2013/05/23

Macarons with 4 different fillings


Aaah, macaron. My old foe.

For the longest time, I was scared to even try to make macarons, because all the recipes I read sounded like being able to make a good macaron involved about 278 steps that needed to be exactly right in order to get an edible cookie. And I'm really not good with following directions exactly. Nevertheless, I tried my luck twice and both times turned out, well, inedible.

Back then, when I tried to find out what had gone wrong, I was left with about a dozen possible explanations: Hadn’t I aged the egg whites long enough? Did I maybe use 126 grams of egg white instead of 117 grams? Did I whip them 45 seconds too long? Of course in hindsight, all of this was stupid. Now, I’m pretty sure the first time around I just sucked at macaronage and didn’t fold the mass long enough and the second time I simply took them out of the oven way too early, so they fell apart.

How do I know that now? I found Stella’s Macaron Mythbuster post. And I could have kissed her. A pastry chef telling everybody to chill out, because making macarons does not involve magic or any kind of elaborate preparation? Exactly what I needed to try again.

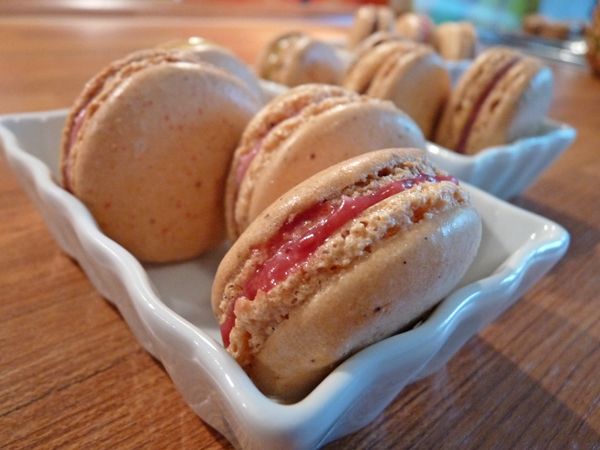
So after making the Portuguese Croissants for brunch, I had a lot of egg whites left over that I didn’t want to throw out, so it was the perfect opportunity to try again. This time, though, I tried to stick to Stella’s recipe as closely as possible and didn’t add colors or anything, because it was about trying to get the macaron right first. Colors and more elaborate flavors than vanilla are reserved for next time.

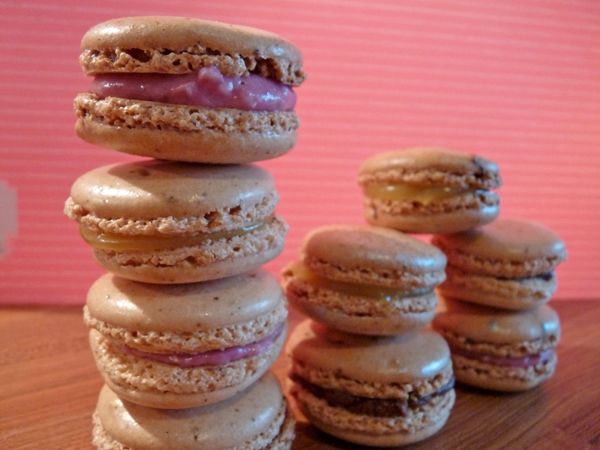
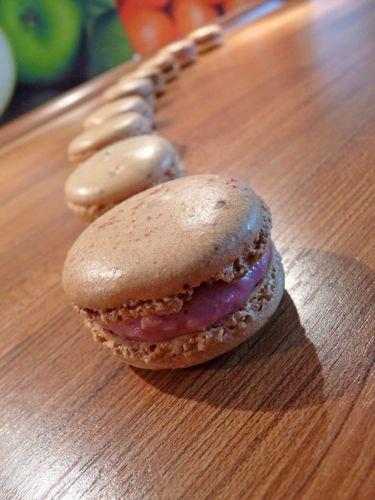
And lo and behold, they turned out beautifully. Alright, alright – maybe they could’ve been a little bit prettier, but that was me being totally unable to pipe them right. They tasted really nice, though and I’ll definitely stick to this recipe from now on, at least for almond and vanilla flavored shells (I’m planning on trying peanut butter shells next, though, as soon as I can get my hands on some peanut flour).


Plain Vanilla and Almond Macarons with 4 Different Fillings

[Shell Recipe from Brave Tart]

115g almond flour
230g powdered sugar
145g egg whites
70g sugar
mark of 1 vanilla bean
2g salt

1. Sift the almond flour and powdered sugar together. Set aside.

2. Mix egg whites, sugar, mark of the vanilla bean and salt and whip until it forms firm peaks, about 8 to 10 minutes, depending on how fast your machine works.

3. Dump the almond-sugar mixture on top and fold it into the egg whites. Every few turns, spoon out some of the mix and drop it back into the bowl. The mixture has the right consistency when it takes about 20 seconds for the spoonful to incorporate itself into the mix again. If it stays sitting on top, keep folding, if it incorporates quicker - well, you've screwed up. [Stella's recipe says it takes about 40 folds, mine took almost twice as many, so it's important not to simply count, but really check the consistency!]

4. Fill about half of the batter into a piping bag with a round tip and start piping circles onto a baking tray covered with baking paper. [Now I have a macaron silicone sheet, so I don't have to worry about size, but if you don't have one of those and want equally sized circles, find something round about the size you want your macarons to be, and use it as a pattern to draw circles onto your baking paper before you start piping. Don't fill your circles to the very edge, because the macarons will spread a little bit.]

5. Rap the tray on the counter a couple of times (to disperse air bubbles) and bake at 150°C for about 20 minutes. (Right away. You do NOT have to let them sit on the counter. I actually had two sheets and one had to wait 20 minutes until the other was done and the macarons I put into the oven right away had nicer feet than the ones sitting on the counter for 20 minutes).

6. Let them completely cool before you start filling them.


Fillings

I had actually made some coffee chocolate ganache for the filling, but the stuff took forever to cool down and harden and I was on a timetable, so I had to improvise. I filled some of them with lemon curd, some with peanut butter mixed with a couple of teaspoons of melted chocolate, some with raspberry jam and some with a mix of raspberry jam and coconut bread-spread (for the Germans: REWE's "Glück der Tropen"). The fillings all went really well with the subtle vanilla flavor of the shells and the peanut-butter-chocolate ones tasted especially great on the next day when the flavor had had some time to settle.

Bon appetit!


♥ Nicole

2013/05/19

Portuguese Croissants


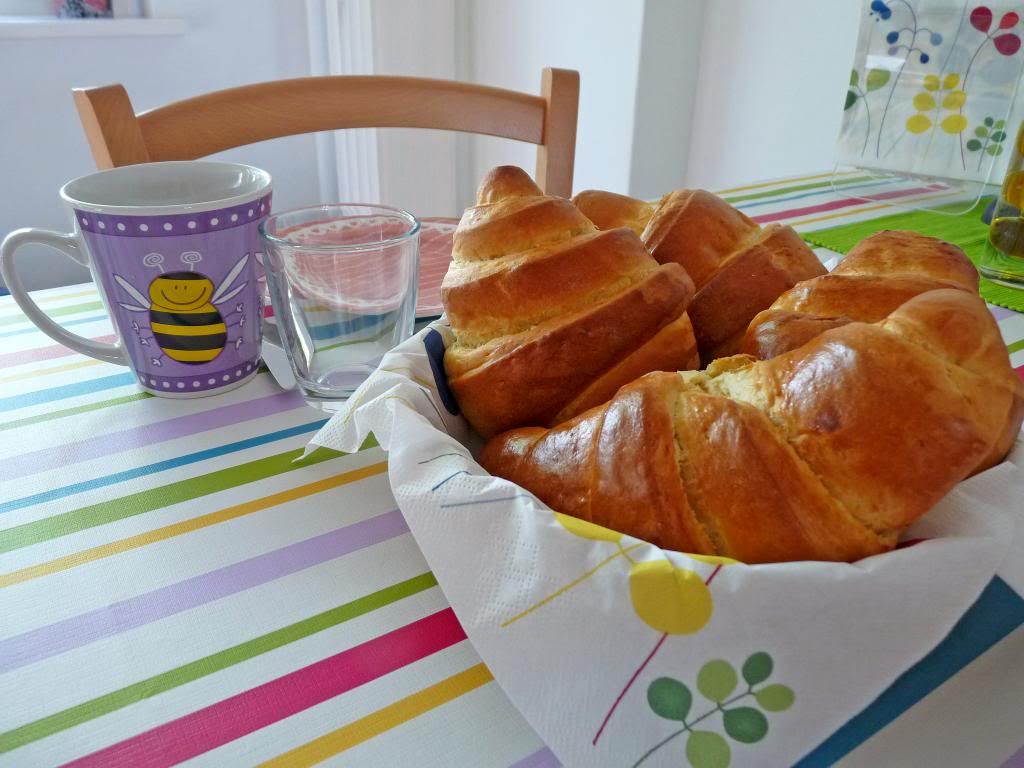
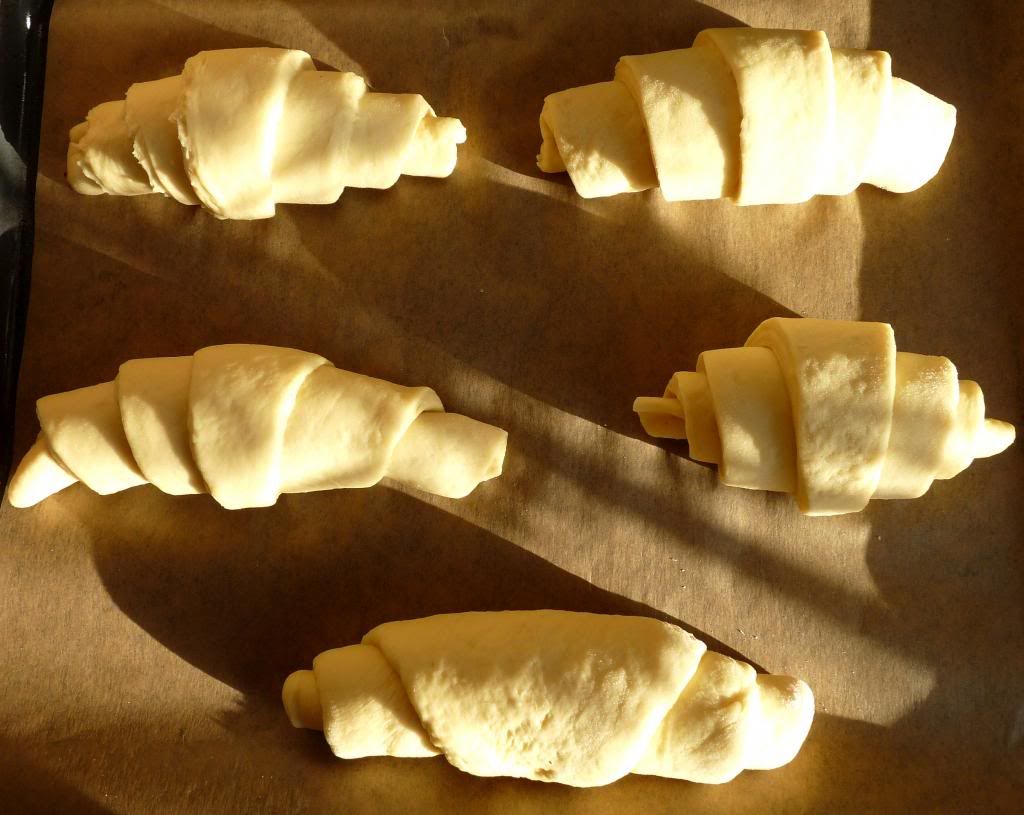
Close to my old workplace, there's this little bakery that sells the most amazing portuguese croissants. They are soft and yellow and sweet and oh my gosh, just so good with ham and cheese. Before I moved here, I had never had or even seen a portuguese croissant and at first I didn’t quite know what to make of them, but it only took one bite to get me addicted. I've been in withdrawal since I don't come by there every day anymore, so I decided to make some croissants for brunch last week.

The recipe I had seemed a bit wonky from the beginning and it turned out I was right. For instance, for a croissant that apparently can be translated as “milk bread” from Portuguese (don’t quote me on that, though), it sure had very little milk in it. So I had to adjust some of the ingredients to even get a working dough, but in the end they still looked nothing like the croissants from the shop. They did taste really good, though: soft and rich and slightly sweet and also really, really good with ham and cheese, but also with jam. So even though they’ll never replace the ones from that little café, they are quite an adequate substitute when I can’t get the real thing.


Portuguese Croissants

Ingredients:

200ml milk
375g flour
1/2 envelope active dry yeast
80g sugar
75g butter
pinch of salt
4 egg yolks

1. Warm the milk, but don't let it boil. Mix the flour and yeast with half of the sugar, pour the warm milk on top and mix until smooth. Let it sit in a warm place for half an hour.

2. Cut the soft butter in small pieces and add it to the dough. Add the other half of the sugar, 3 egg yolks and the pinch of salt and knead with a dough hook until you've got a fairly smooth dough. It's alright if it's still a little sticky.

3. Let the dough rise in a warm place for about half an hour, deflate it and put it in the fridge overnight. (Note: I usually prepare yeast dough in the evening and let it rise overnight in the fridge a second time, so I can use it the next morning, since letting the dough rise in the fridge makes it more finely pored. If you don't want to do that, simply let the dough rise for about 45 minutes and then go to the next step.)

4. The next morning, get the dough out of the fridge, let it warm up for about 15 minutes, deflate it, knead it for a couple of minutes on a floured surface, then roll it out in a rectangle of about 20x40cm. Cut the dough into 5 or 6 triangles and roll them up from the long end.

5. Mix an egg yolk with 2 tablespoons of milk (alternatively: water) and brush the croissants with it. Let the croissants rise for another 30 minutes in a warm place.

6. Bake for about 15 minutes on 200°C.

Enjoy!

♥ Nicole

2013/05/10

Vanilla and Red Fruit Tarts


So I had brunch and a bit of a sewing session with my friend Kathi today (who I've been badgering about guest-blogging here considering she's the actual seamstress out of the two of us, so I'm sure you're gonna meet her sooner rather than later). No finished sewing projects to show yet (I've been working on Tilly's Miette Skirt under Kathi's tutelage, though I'm beginning to think I might be a bit of a lost cause), so considering how horrible the end product turns out to be you might get some pictures soon.

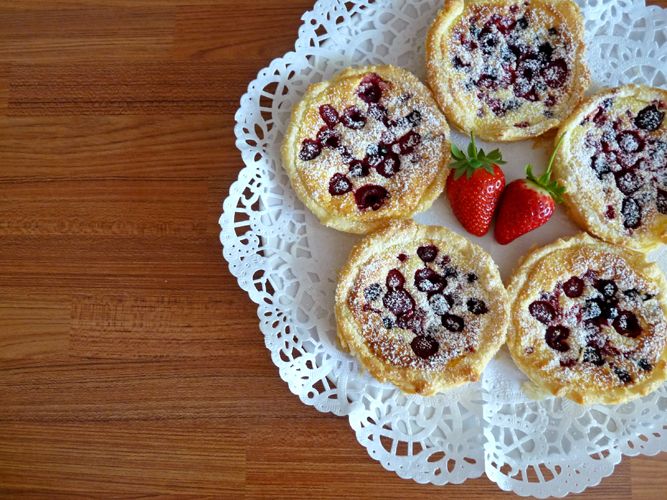
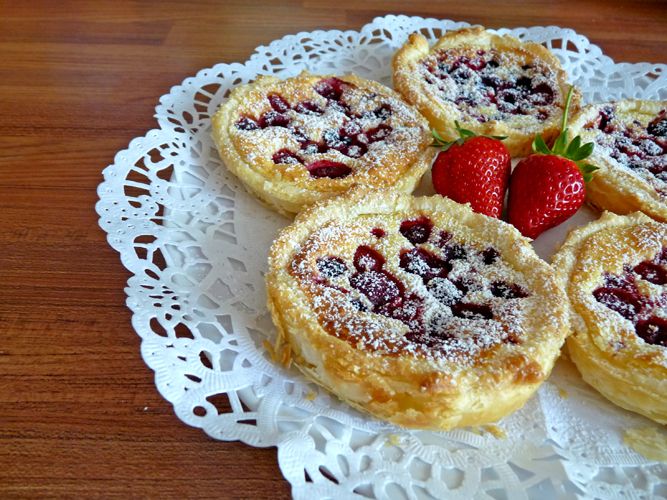
Anyway. I made some portuguese croissants (recipe to follow in the next post) and then on a whim decided I wanted to make some danishes as well. As usual, though, it was one of those days where I had planned to do one thing and ended up with something completely different. I had planned to fill the danishes with cream cheese and peach jam, but because I don't use my brain all that often I thought "why not make it a bit more cheesecake-like!" and added an egg to the cream cheese. Which turned the whole thing into cream cheese soup. So I had to think of a plan B. I still had puff pastry and I had cream cheese soup. What's a girl to do? This.


Vanilla & Red Fruit Tarts

Ingredients:

250g puff pastry (frozen or fresh, I usually use fresh)
200g cream cheese
1 TB sugar
1 egg
1 p. instant vanilla pudding powder (I used Dr. Oetker Garant)
1 cup red fruit (fresh or frozen, I used frozen)


1. Line 5 small tarte forms (mine are 11cm in diameter) with the puff pastry. (Just cut a circle or a square, press it gently into the forms and up the sides and cut off any excess overflowing the form)

2. Using a hand mixer, mix the cream cheese, sugar, egg and vanilla pudding powder for about a minute.

3. Fill the tarte forms about 3/4 with the cream cheese mixture and put some red fruit on top (how much fruit is totally up to you).

4. Bake on 175°C for about 20 to 25 minutes (until the puff pastry turns golden).

5. Let the tartes cool down a bit and gently unmold them.

6. Sprinkle with powdered sugar before serving.

Enjoy!

♥ Nicole

2013/05/09

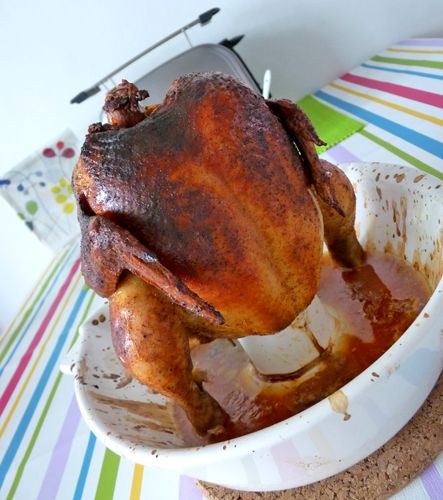
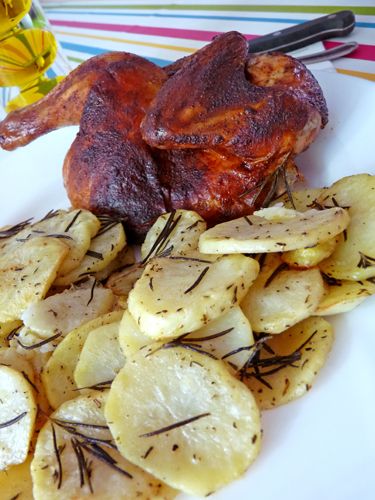
Roast Chicken with Rosemary and Thyme Potatoes

So. I'm not a cook. At all. I know, like, 20 meals tops (and that includes spaghetti and mashed potatoes) and even those usually turn out...well...edible, but not exactly mindblowingly good. So I try to stick to stuff where you can't do a whole lot wrong and I rarely cook anything that takes longer than 20 minutes to make. I'll do a roast for Christmas, but that's pretty much it. Last Christmas, I overplanned a bit and wanted to do a marinated beef roast and a roast chicken, but the beef turned out to be so much that I had to eat it for three days straight to get through it, so the chicken's been sitting in my freezer ever since.

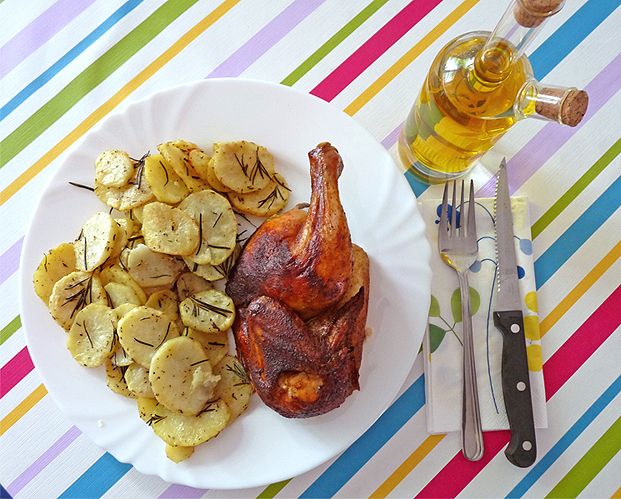
So. Cue the long weekend, a public holiday and me with too much time on my hands, so I thought I'd give the roast chicken a go. And it didn't turn out too badly.


More than that, it was finally an excuse to use my chicken roaster that's been sitting in my cupboard for like 2 years now. I love it because not only is it shaped like a chicken (which I only realized after it had been sitting there for 6 months), it helps make your chicken really crispy, because all the fat can run out while it's roasting.


I did forget, however, how weird it feels handling a whole chicken. I think when you're just roasting or frying a chicken breast or a steak or whatever you can easily forget that you're holding part of an animal in your hands. I never thought about that before today, but it felt kinda weird for a moment to pick it free of its last feathers and move its legs and wings around. Anyway.. I feel a bit weird writing down a recipe for this, because there wasn't much actual cooking going on. I used a ready-made seasoning and just stuck it in the oven on 190°C for about 65 minutes. What I like to do though is instead of brushing it with oil while it's cooking, I like to brush it with milk every quarter hour, which makes the skin extra-crispy. The potatoes were brushed with olive oil and seasoned with salt, pepper, thyme and rosemary and I just stuck them in the oven about 20 minutes before the chicken was done. Just make sure you cut the potatoes about equally thick so they're done at about the same time. Mine were about half a centimeter thick.


Alright, I'm off to find some dessert!

♥ Nicole

2013/05/03

Kind of a "best of", part 2

Alright, where were we? Fondant! Right. So since I really enjoyed the fondant course, I did a second course at the same place, this time tackling edible flowers...


Well, let me just tell you: I'm a rose girl through and through. Who needs lilies anyway? Even though they might look a lot easier to make, they're not. The roses on the other hand I loved. So much apparently that I smashed one of the kitchen floor not 10 minutes after these pictures were taken. Good thing I'm a bit of an overachiever and did two during the course.


Cookies! I LOVE cookies. For some reason, though, I only seem to make them on Christmas. But then I usually go to town and spend days in the kitchen until I'm satisfied. Fortunately for me, my old workplace had a Christmas tradition where you could bring in Christmas cookies, people could buy them and the money got donated to a good cause. So fortunately for my hips, I didn't have to eat all of this by myself (...and that was only a little part of what was actually there):


Another one of my obsessions is peanut butter...


Mind you, I hate the stuff right out of the jar. It needs to either be incorporated in any type of baked good or come in a package that says "Reese's". These were Peanut Butter Choc Chip Cupcakes with a Peanut Butter Cream Cheese Frosting. Hmmm....Peanut Butter...


This was the birthday cake I made for my other former boss. It was probably one of the more involved cakes I've ever made. It had a chocolate base (...I just realized that apparently I only take pictures of all the cakes that have chocolate in them. I swear, I do make non-chocolate cakes occasionally), white choc and hazelnut ganache, chocolate panna cotta and red berry mascarpone mousse as well as a raspberry glaze. It was enclosed in a thin sheet of chocolate and I even made the decorations myself (which I'm very proud of, even though that was probably the easiest part of the whole cake).

Alright, I think that's enough for now. As I said in part 1, I hope to actually start blogging for real very soon, but bear with me if it takes a little while to actually find an event to bake for (if I bake for myself, I will have to eat it all myself - and my hips seriously won't thank me for it).

Thank you for stopping by!

♥ Nicole

PS: If you are interested in any of the recipes, I will try my best to find and recreate them (that is: find them in my folder of of recipes where I'm sure I've bookmarked them somewhere), so let me know if you're interested in a particular recipe!

Kind of a "best of", Part 1

So, as I haven't gotten around to baking at all lately (and let's not talk about my recent sewing misadventures...), I'm just gonna start of with a bit of a "best of" my baking adventures. Which isn't really a "best of" considering I usually forget to take pictures of most of the stuff I make. So actually, this is more of a "stuff I remembered to photograph" collection...so to speak. ANYWAY. As you will soon realize, I'm not exactly what you'd call a "good photographer" yet. At least not when it comes to food. So far, taking pictures of what I've made has mainly been an afterthought and you can really see that in a lot of pictures. I promise I will try to make more of an effort in the future (considering that now I might not be the only one looking at them yet) and, hopefully, my pictures will improve soon. What also makes taking great pictures with a nice setup a tad difficult is that I usually bake for other people's birthdays, so I can't really deliver photos of the inside of almost anything, because, well, it would be kinda rude to gift people with cakes that are missing a piece. But I'm grateful for any advice you might want to give me! No recipes yet in this post (...that'll happen as soon as I don't forget to write down what I'm doing while I'm doing it), because some of this pictures are from like, a year or two ago and I can barely remember what the stuff WAS, much less how I made it (...most of the time I barely remember what I had for breakfast). Yeah, I know, so far, I'm probably the worst food blogger in the history of food bloggers. Please forgive me. I promise to do better in the future. On basically every aspect of blogging. I swear! But let's get to the most important stuff: the food. So, what to start with?


This was an Almond & Peach Galette I did a couple of years back. First time I ever made frangipane....and I'm still preeeetty sure frangipane was neither supposed to look like that nor taste like that. Looked great, though! (And got eaten anyway. ;))


These were Coconut Cupcakes with a Peach Frosting that also did not quite turn out how they were supposed to if I remember correctly (are you starting to see a trend here?). So they got doused in coconut flakes and something pretty got popped on top and nobody even realized that that wasn't how they were supposed to look like.


My former boss's 40th birthday cake, which was a chocolate cake with orange mascarpone mousse. It had like, 5 layers and weighed over 4 pounds. The chocolate cake is my tried and tested recipe, but I wasn't too convinced when it came to the oranges. They tasted a bit bitter after a while, so next time I'd probably make it with a different fruit.


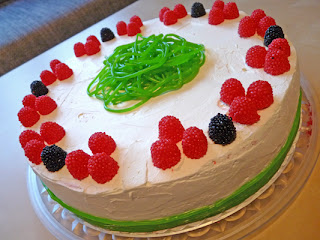
Another birthday cake, this one for a former colleague of mine. It was a bit of a joke, because she always has a big bowl of candy on her desk at the office and I probably stopped by there half a dozen times a day to get my sugar fix (which was apparently far more often than anybody else). The cake itself looked very different from the inside. It was a chocolate cake with a choc ganache and red berry mousse.


Ah, my first attempts at working with fondant. I did a course at a local shop here and this was the result and I actually quite liked how the blue one turned out. So naturally, after managing not to ruin a cake on the first try, I was convinced I'm a fondant master now and decided to make another fondant cake in honor of J.K. Rowling's new book (which I didn't realize at the time would suck - the book that is...well ok, the cake as well). Turns out: I'm not a fondant master by a long shot. Let's just leave it at that.

Alright, more in part 2! ♥ Nicole

PS: If you are interested in any of the recipes, I will try my best to find and recreate them (that is: find them in my folder of of recipes where I'm sure I've bookmarked them somewhere), so let me know if you're interested in a particular recipe!

2013/05/01

Well, hello there!

Let me just preface this by saying: I have no idea what I'm actually doing here. I'm an alright baker, a somewhat talentless novice sewer, a mediocre photographer and a rather unimaginative crafter. So naturally, starting a blog about all my endeavors seemed like a good idea. 

Nevertheless, I hope to make this the home of all my crafty projects, sewing attempts and, most importantly, baking experiments. Which probably means I'll have to actually finish the stuff I start now. And I'll have to remember taking pictures of everything now, which is going to be a challenge in itself. Right. Still trying to remember why starting a blog seemed like a good idea?!?!

Anyway. As you can see, even though this isn't my first blog, I still have the jitters. Probably because this is the first time I won't just be posing random rants, but will actually show everyone what I can and cannot do. With so many incredible bloggers already out there, that seems a bit daunting. So I hope you bear with me, maybe occasionally give me a word of advice or encouragement and I promise I'll try my best to make it worth your while.

So, I hope to have my first projects up here pretty soon or at least give you a bit of a "best of" what I've done so far!

♥ Nicole