So last week…or the week before…no idea anymore…I celebrated my birthday for the second time (not that I’m still at an age where your birthday is something you look forward to) and I wanted to make one of my all-time favorite cakes: a Kinderriegel Gateau. You know Kinderriegel? Milk chocolate bars with a milk center? Heavenly. And the cake seriously tastes just like the bars. Love it.
But knowing me, you all know what comes next: Right. Didn’t work out the way I planned it, because for some reason, my chocolate cream curdled. Which it has never done before. Sometimes I really wish I knew more about how baking worked so I actually knew why this stuff keeps happening to me so I can avoid it in the future.
Anyway. So, I had to improvise (really, this blog should be called “A study in improvisation” or something). Fortunately, I still had some stuff at home to make a raspberry cake out of the chocolate cake and that one at least turned out rather yummy if I’m allowed to say so myself.
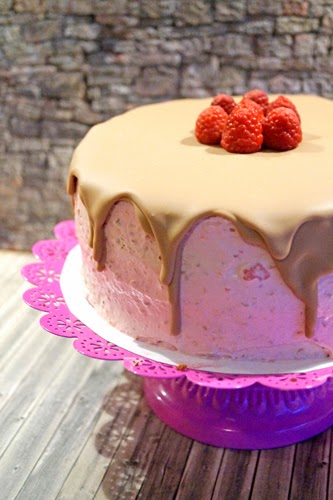
Raspberry Chocolate Cake (with a hint of Kinderriegel)
For the cake:
150g all-purpose flour
150g white sugar
150g butter
1 p. vanilla sugar (if you don’t have any, use ½ tsp vanilla extract)
100g melted chocolate (in this case: Kinderriegel if you have access to them)
6 eggs
2 tbsp. dutch cocoa
2 tbsp. baking powder
For the raspberry filling:
400g sour cream
500g quark
100ml whipped cream
100g white sugar
3p. vanilla sugar
3-4 cups of raspberries (fresh or frozen)
gelatin (6 to 8 sheets or 1 p. of gelatin powder)
For the decoration:
a few raspberries
about 100-140g of melted (milk) chocolate (5-7 Kinderriegel)
1. Beat the butter with an electric mixer until it’s light and fluffy. Slowly add half of the sugar, the vanilla sugar, melted chocolate and cocoa and mix well after each addition.
2. Add two whole eggs and four egg yolks.
3. Mix the flour and baking powder and add slowly.
4. Whip the egg whites to a stiff peak, slowly adding in the rest of the sugar, and fold into the batter.
5. Line a spring pan (28cm) with baking paper on the bottom and use some cooking spray or butter to grease the sides lightly. Pour in the batter.
6. Bake on 180°C for about 40 minutes or until a toothpick inserted into the middle comes out clean.
7. Let the cake cool for half an hour, then cut it into two layers.
8. Beat the cream to stiff peaks.
9. Put your raspberries through a food processor, leaving a few aside for decoration (I used frozen raspberries, so of course I had to thaw them first). I don’t mind eating raspberry seeds, so I didn’t do anything else, but if you don’t want the seeds in your cake or are looking for a smoother finish when frosting the cake, strain the raspberries through a sieve after puréeing them.
10. If you don’t have gelatin that works on cold liquids, warm up your raspberries (in a microwave or on the stove) and add the gelatin, stirring constantly until it’s completely incorporated. If your gelatin works on cold liquids, you can stir it in without having to warm up the raspberries.
11. Beat the quark and sour cream with an electric mixer, adding the sugar and vanilla sugar while beating.
12. Add the raspberries to the quark and beat until well incorporated.
13. Fold in the cream (if you had to warm up your raspberries, wait until the mix has cooled down a little).
14. Spread about 2/3 of the cream onto the bottom layer of the cake and put the second layer on top. Use the rest of the filling to frost the outside of the cake. If you feel like your filling isn’t firm enough to frost the cake immediately, put the cake into the fridge for an hour or two before you start frosting.
15. Put the cake into the fridge for a couple of hours so the filling and frosting can set properly.
16. Melt the chocolate, but let it cool down until it starts to thicken again before pouring it over the cake. Use an angled spatula to even it out if necessary.
17. Decorate with some raspberries or whatever else you like.
Enjoy!
♥ Nicole
Posts mit dem Label raspberry werden angezeigt. Alle Posts anzeigen
2014/02/18
2013/11/19
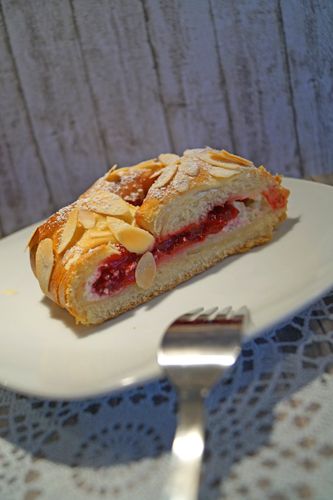
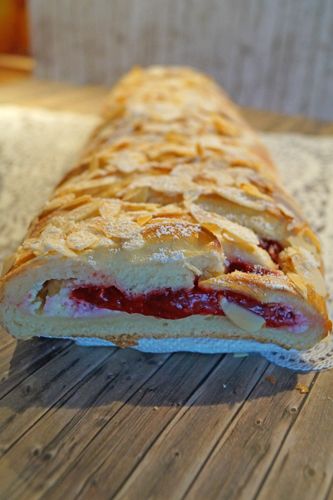
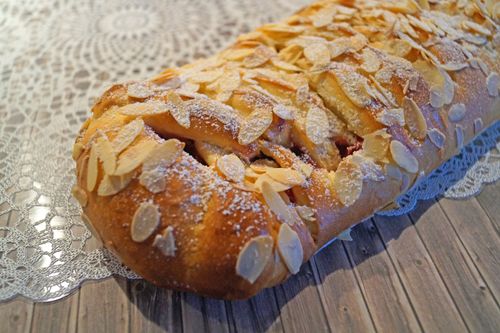
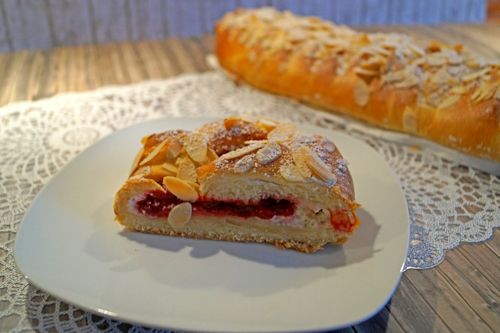
Raspberry Cream Cheese Braid
Argh, it's been over a month again since I posted. I'm sorry. But yeah, my three jobs are really keeping me busy lately. So I was actually really glad when I got the chance to bake something last week when a good friend of mine visited.
I saw this braid quite a while back on Toxo Bread (in the original recipe, it's a blueberry braid) and at first, I was a little put off, because there are quite a few steps involved and the dough has to rise four times. Yes, you read right. FOUR times. So definitely not something you're gonna do at the drop of a hat. There's gotta be some planning involved. But it looked so yummy that I broke down eventually and boy, am I glad I did.
Now let me tell you, yeast and I - we're not the best of friends, so usually I don't expect much when I start working with it. But I've made this braid about half a dozen times now and it's turned out beautifully every single time. I've tried different fillings (blueberry, raspberry, peanut butter, thinly sliced apples) and they've all been delicious (well, the peanut butter was a bit of a letdown, but all the fruity fillings were great), so you definitely can play around with that depending on what you like best. If you want to make it a little lighter, you can use quark instead of cream cheese; if you don't have fresh fruit, I'm sure you can use jams instead. So seriously, if you want something really, really great for breakfast (And dessert. And coffee. And maybe a little slice after dinner.) - try this. I know it's a little time-consuming, but you will not be disappointed. I'm kinda tempted to use this yeast recipe for everything now. I think I'll try cinnamon rolls next.
Raspberry Cream Cheese Braid
For the sponge:
1/2 tbsp active dry yeast
1/2 tbsp white sugar
180ml warm milk
120g all-purpose flour
For the dough:
1 egg
3/4 tbsp salt
40g white sugar
200-250g all-purpose flour
65g butter, softened
For the fruit filling:
150-200g raspberries (frozen ones are fine)
25g white sugar
15g cornstarch
1 tbsp lemon juice
For the egg glaze:
1 egg
1 tbsp milk
For the cream cheese filling:
200g cream cheese
2 tbsp white sugar
1/2 tsp vanilla extract
1 tbsp egg glaze
For the decoration:
50g sliced almonds
powdered sugar
1. For the sponge, mix the sugar, yeast and flour and pour the warm (not hot) milk over it. Mix with a spoon until you have a fairly smooth mixture. Let rise in a warm place for about 30 minutes.
2. Add the egg, salt, sugar and about half of the flour for the dough to the sponge and mix with an electric mixer (dough hook) until you have a smooth dough. Add the butter in small pieces and keep mixing with the dough hook until it's well incorporated. Keep adding flour until you have a working dough that's not sticky anymore, about five minutes (well, it can be a little sticky, but it should be workable).
3. Place the dough in a lightly greased bowl and let it rise in a warm place for about 2 hours, until it has doubled in size.
4. In the meantime, put your raspberries in a saucepan and add the sugar, lemon juice and cornstarch. Bring it to a boil and then let the mixture cook on medium heat for about five minutes. I don't mind having the seeds in there and having a bit of texture to the filling, so I don't bother with pureeing the raspberries and putting them through a sieve. If you don't like that, do those things before you add the cornstarch to your berry mixture. The mixture will start to thicken while it cooks. Once you take it off the stove, put it in a bowl and cover it with clingwrap, so no skin will be forming on top. Put in the fridge until use after it has cooled down a little.
5. For the egg glaze, simply mix an egg with a tablespoon of milk (mixing it with a fork will suffice). Put in the fridge until use.
6. For the cream cheese filling, just mix all of the ingredients together with an electric mixer. Put in the fridge until use.
7. Once your dough has risen for about 2 hours, deflate it, cover the bowl with clingwrap and put it into the fridge overnight.
8. The next morning, take the dough out of the fridge and let it warm up for about half an hour before taking it out of the bowl and kneading it for a couple of minutes.
9. Roll out the dough to a rectangle of about 20x40cm, about 1cm thick.
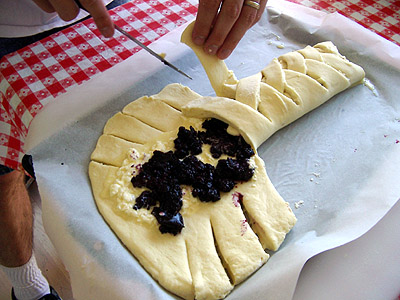
10. Spread first the cream cheese, then the raspberry filling on top of the dough - but be careful: we still need to braid the dough, so don't go overboard with the filling and only put it in the very center of the dough, taking up about 8 to 10cm in width!
11. Now slice the left and right side of the dough at an angle so you get tabs about 2 to 3cm wide. Start braiding the dough by folding over the tabs, alternating from side to side. (You can find a great photo of this step at The Fresh Loaf!)
12. When you're done, glaze the braid with the egg wash and let it rise for about 45 minutes in a warm place until it has about doubled in size.
13. Once it's risen, glaze again with egg wash and top with sliced almonds.
14. Bake on 175°C for about 35 to 40 minutes until it's golden brown.
15. Let the braid cool down for at least 30 minutes before slicing it. Dust with powdered sugar.
Enjoy!
♥ Nicole
2013/08/27
The Most Unprofessional Professional Cake Ever (or: how Nicole totally overestimated her skills)
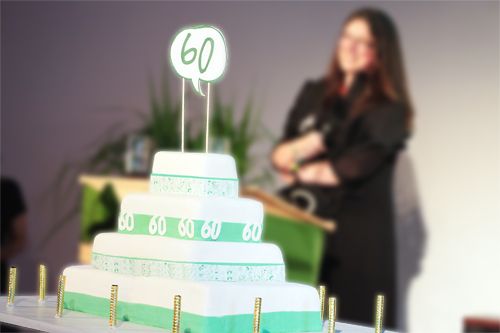
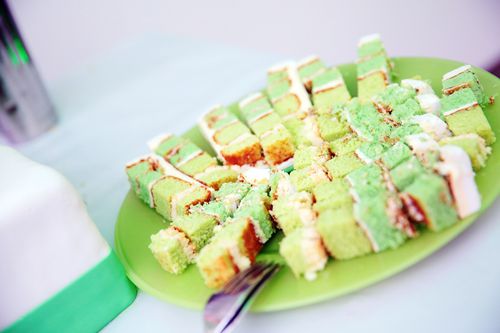
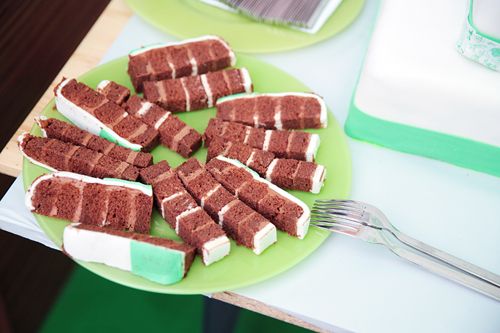
So at my old workplace I was known for the birthday cakes I made for colleagues at least a couple of times a month. So when the company's 60th anniversary rolled around, they asked me whether I'd feel up to making the cake for the anniversary party - with 350+ guests, even though I don't even work there anymore. And totally floored by the honor of being asked I was like "Sure, no problem at all. Cake for 350 people? Coming right up."
(c) Nina Stiller (edited by me)
To give you a bit of a frame of reference here: until last Wednesday, I had worked with fondant exactly twice. Both times on cakes smaller than an average spring pan. I had never made a tiered cake. And the biggest cake I had ever made was probably my former boss's birthday cake, which had 4 layers, but was still the size of a normal spring pan.
You see where I'm going with this, right?
The party was Friday night, so I went shopping on Tuesday (and seriously, the looks you get at the grocery store when you buy 150 eggs and 8kg of butter - I mean, it's not that uncommon), was planning to bake on Wednesday and fill and decorate the cakes Thursday and Friday. I was totally convinced I had bought way too much stuff for the cake.
First mistake.
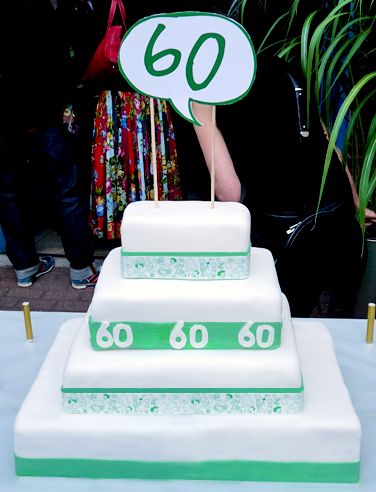
(c) Nina Stiller
Wednesday night I had my first mini-breakdown, because of course I had way too little cake for the size I had planned for. Plus, my go-to-chocolate cake recipe that even has "perfect for layer cakes!" scribbled in the margins of my recipe book failed me for the first time ever. Seriously, "Murphy" should be my middle name. So around midnight I finally had a plan worked out on how to rescue the cake...which I discarded again around 7am the next morning. I finally decided on losing a tier and just making the bottom tier out of two different cakes to give it some height. Then I got my ganaches out of the fridge to start filling the first cakes.
Any my white ganache had totally curdled. Again. (This always happens!! What am I doing wrong?!) So two hours of chopping chocolate all for nothing and no plan B in sight. About 5 pounds of emergency buttercream and 6 hours later I had finally filled all the cakes and crumbcoated them. Of course since all my cakes were totally falling apart, I had to completely scale back on my cream fillings and up the buttercream/ganache portion in the hopes that that stuff would basically glue them together.By this point, everything non-cake-essential (meaning: all my normal groceries) had to leave the fridge because there wasn't any space left.
So sometime that afternoon I started covering the first cakes in fondant and - as I had pretty much expected by that point - that didn't go as smoothly as I had planned either. I was using Satin Ice instead of Wilton fondant for the first time and first found it very sticky only for it to completely crack when I covered the cake with it. I'm pretty sure it was me doing something wrong, I just have no idea what it was. Did I knead too long? Not long enough? Should I have used some GumTex to make it more pliable? No idea.
Anyway. Since my crumbcoating skills leave something to be desired as well, the fondant was anything but smooth, but by that point I honestly didn't care anymore (okay, that's a total lie, but I couldn't do anything about it, so I had to move on). After I had covered three of the layers, I wanted to color a bit of fondant green for the decoration and let me tell you, I used almost an entire bottle of gel coloring, but do you think the silly stuff turned the green I wanted? Of course not. It stayed a minty pastel instead of turning a nice dark green. I could have lived with that, but when I started rolling the fondant out and cutting strips to cover the cake with, suddenly the fondant wasn't all cracking and sticky anymore - noooo, now it had the consistency of chewing gum. So instead of a nice even strip of green around the cake, I had a completely uneven...something. I attached the fondant paper anyway and just hoped everyone would be drunk enough at the party so they wouldn't actually see it.
(c) Nina Stiller
When I got up Friday morning, I felt like someone had run me over. Holy sh..., I've never been this sore from baking a cake. It felt like I'd built a house, not a cake. I still had to cover the bottom layer with fondant and finish my decorations, though, so I had to get up anyway....only to realize that I had no space anywhere to roll out the fondant as big as I needed to cover the whole layer (not too mention: how do you roll out fondant to that size (about 100x80cm) while keeping it even? And how do you move it after you've managed to roll it out?) In the end I decided to cover the two cakes separately, also because they would fit back into the fridge until the caterer picked them up that way, which was a plus considering the temparatures (but also looked very, very amateurish).
Shortly before the caterer came by to pick up the cake I arranged the bottom layer on the cake board we had made - only to realize when we wanted to bring the cake outside that the board didn't fit through my kitchen door. Let me tell you, I was dying inside when we had to start tilting the board to get it through the door, but alas, we made it without the cake ending on the floor.
I will spare you the story of how the caterer transported my poor cake. Let me just say, I refused to be left behind and insisted on him taking me with him, because I didn't trust him with the cake after I'd seen the vehicle it was transported in (not to mention that he ripped of half of my specially printed fondant paper while putting the cake in the car - thank you very much). I'll also spare you the story of what happened when we got to the party. Let's just say I was pretty close to a complete meltdown before the cake was finally assembled and found it's rightful place on the dessert buffet.
In the end, I was happy the cake arrived (mostly) safe and sound and people seem to have liked it (it even ended up being featured in the trade press as part of the anniversary coverage), so all's good. I still think I should have done a lot better, though, and I'm still kind of embarrassed by all the flaws the cake had.
So the next time someone asks me to make a cake for 300+ people and I'm tempted to say yes? Please someone whack me with a baking tray.
♥ Nicole
To give you a bit of a frame of reference here: until last Wednesday, I had worked with fondant exactly twice. Both times on cakes smaller than an average spring pan. I had never made a tiered cake. And the biggest cake I had ever made was probably my former boss's birthday cake, which had 4 layers, but was still the size of a normal spring pan.
You see where I'm going with this, right?
The party was Friday night, so I went shopping on Tuesday (and seriously, the looks you get at the grocery store when you buy 150 eggs and 8kg of butter - I mean, it's not that uncommon), was planning to bake on Wednesday and fill and decorate the cakes Thursday and Friday. I was totally convinced I had bought way too much stuff for the cake.
First mistake.
Wednesday night I had my first mini-breakdown, because of course I had way too little cake for the size I had planned for. Plus, my go-to-chocolate cake recipe that even has "perfect for layer cakes!" scribbled in the margins of my recipe book failed me for the first time ever. Seriously, "Murphy" should be my middle name. So around midnight I finally had a plan worked out on how to rescue the cake...which I discarded again around 7am the next morning. I finally decided on losing a tier and just making the bottom tier out of two different cakes to give it some height. Then I got my ganaches out of the fridge to start filling the first cakes.
Any my white ganache had totally curdled. Again. (This always happens!! What am I doing wrong?!) So two hours of chopping chocolate all for nothing and no plan B in sight. About 5 pounds of emergency buttercream and 6 hours later I had finally filled all the cakes and crumbcoated them. Of course since all my cakes were totally falling apart, I had to completely scale back on my cream fillings and up the buttercream/ganache portion in the hopes that that stuff would basically glue them together.By this point, everything non-cake-essential (meaning: all my normal groceries) had to leave the fridge because there wasn't any space left.
So sometime that afternoon I started covering the first cakes in fondant and - as I had pretty much expected by that point - that didn't go as smoothly as I had planned either. I was using Satin Ice instead of Wilton fondant for the first time and first found it very sticky only for it to completely crack when I covered the cake with it. I'm pretty sure it was me doing something wrong, I just have no idea what it was. Did I knead too long? Not long enough? Should I have used some GumTex to make it more pliable? No idea.
Anyway. Since my crumbcoating skills leave something to be desired as well, the fondant was anything but smooth, but by that point I honestly didn't care anymore (okay, that's a total lie, but I couldn't do anything about it, so I had to move on). After I had covered three of the layers, I wanted to color a bit of fondant green for the decoration and let me tell you, I used almost an entire bottle of gel coloring, but do you think the silly stuff turned the green I wanted? Of course not. It stayed a minty pastel instead of turning a nice dark green. I could have lived with that, but when I started rolling the fondant out and cutting strips to cover the cake with, suddenly the fondant wasn't all cracking and sticky anymore - noooo, now it had the consistency of chewing gum. So instead of a nice even strip of green around the cake, I had a completely uneven...something. I attached the fondant paper anyway and just hoped everyone would be drunk enough at the party so they wouldn't actually see it.
When I got up Friday morning, I felt like someone had run me over. Holy sh..., I've never been this sore from baking a cake. It felt like I'd built a house, not a cake. I still had to cover the bottom layer with fondant and finish my decorations, though, so I had to get up anyway....only to realize that I had no space anywhere to roll out the fondant as big as I needed to cover the whole layer (not too mention: how do you roll out fondant to that size (about 100x80cm) while keeping it even? And how do you move it after you've managed to roll it out?) In the end I decided to cover the two cakes separately, also because they would fit back into the fridge until the caterer picked them up that way, which was a plus considering the temparatures (but also looked very, very amateurish).
Shortly before the caterer came by to pick up the cake I arranged the bottom layer on the cake board we had made - only to realize when we wanted to bring the cake outside that the board didn't fit through my kitchen door. Let me tell you, I was dying inside when we had to start tilting the board to get it through the door, but alas, we made it without the cake ending on the floor.
I will spare you the story of how the caterer transported my poor cake. Let me just say, I refused to be left behind and insisted on him taking me with him, because I didn't trust him with the cake after I'd seen the vehicle it was transported in (not to mention that he ripped of half of my specially printed fondant paper while putting the cake in the car - thank you very much). I'll also spare you the story of what happened when we got to the party. Let's just say I was pretty close to a complete meltdown before the cake was finally assembled and found it's rightful place on the dessert buffet.
In the end, I was happy the cake arrived (mostly) safe and sound and people seem to have liked it (it even ended up being featured in the trade press as part of the anniversary coverage), so all's good. I still think I should have done a lot better, though, and I'm still kind of embarrassed by all the flaws the cake had.
So the next time someone asks me to make a cake for 300+ people and I'm tempted to say yes? Please someone whack me with a baking tray.
♥ Nicole
2013/05/23
Macarons with 4 different fillings
Aaah, macaron. My old foe.
For the longest time, I was scared to even try to make macarons, because all the recipes I read sounded like being able to make a good macaron involved about 278 steps that needed to be exactly right in order to get an edible cookie. And I'm really not good with following directions exactly. Nevertheless, I tried my luck twice and both times turned out, well, inedible.
Back then, when I tried to find out what had gone wrong, I was left with about a dozen possible explanations: Hadn’t I aged the egg whites long enough? Did I maybe use 126 grams of egg white instead of 117 grams? Did I whip them 45 seconds too long? Of course in hindsight, all of this was stupid. Now, I’m pretty sure the first time around I just sucked at macaronage and didn’t fold the mass long enough and the second time I simply took them out of the oven way too early, so they fell apart.
How do I know that now? I found Stella’s Macaron Mythbuster post. And I could have kissed her. A pastry chef telling everybody to chill out, because making macarons does not involve magic or any kind of elaborate preparation? Exactly what I needed to try again.
So after making the Portuguese Croissants for brunch, I had a lot of egg whites left over that I didn’t want to throw out, so it was the perfect opportunity to try again. This time, though, I tried to stick to Stella’s recipe as closely as possible and didn’t add colors or anything, because it was about trying to get the macaron right first. Colors and more elaborate flavors than vanilla are reserved for next time.
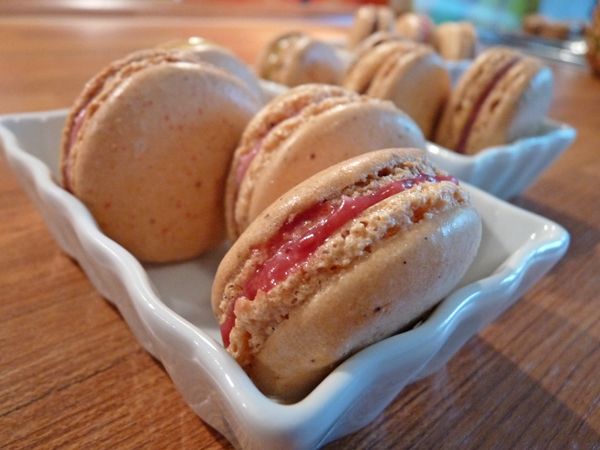
And lo and behold, they turned out beautifully. Alright, alright – maybe they could’ve been a little bit prettier, but that was me being totally unable to pipe them right. They tasted really nice, though and I’ll definitely stick to this recipe from now on, at least for almond and vanilla flavored shells (I’m planning on trying peanut butter shells next, though, as soon as I can get my hands on some peanut flour).
Plain Vanilla and Almond Macarons with 4 Different Fillings
[Shell Recipe from Brave Tart]
115g almond flour
230g powdered sugar
145g egg whites
70g sugar
mark of 1 vanilla bean
2g salt
1. Sift the almond flour and powdered sugar together. Set aside.
2. Mix egg whites, sugar, mark of the vanilla bean and salt and whip until it forms firm peaks, about 8 to 10 minutes, depending on how fast your machine works.
3. Dump the almond-sugar mixture on top and fold it into the egg whites. Every few turns, spoon out some of the mix and drop it back into the bowl. The mixture has the right consistency when it takes about 20 seconds for the spoonful to incorporate itself into the mix again. If it stays sitting on top, keep folding, if it incorporates quicker - well, you've screwed up. [Stella's recipe says it takes about 40 folds, mine took almost twice as many, so it's important not to simply count, but really check the consistency!]
4. Fill about half of the batter into a piping bag with a round tip and start piping circles onto a baking tray covered with baking paper. [Now I have a macaron silicone sheet, so I don't have to worry about size, but if you don't have one of those and want equally sized circles, find something round about the size you want your macarons to be, and use it as a pattern to draw circles onto your baking paper before you start piping. Don't fill your circles to the very edge, because the macarons will spread a little bit.]
5. Rap the tray on the counter a couple of times (to disperse air bubbles) and bake at 150°C for about 20 minutes. (Right away. You do NOT have to let them sit on the counter. I actually had two sheets and one had to wait 20 minutes until the other was done and the macarons I put into the oven right away had nicer feet than the ones sitting on the counter for 20 minutes).
6. Let them completely cool before you start filling them.
Fillings
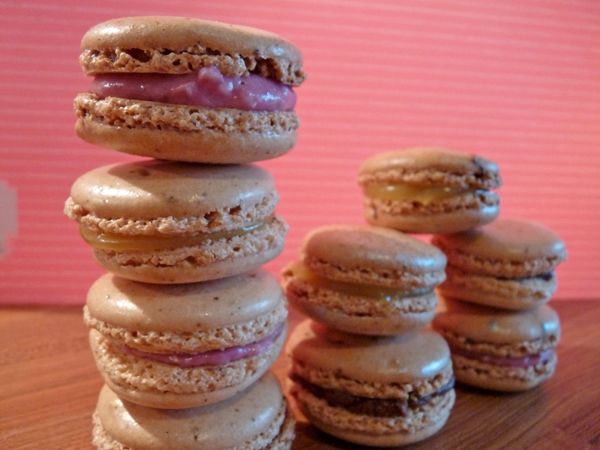
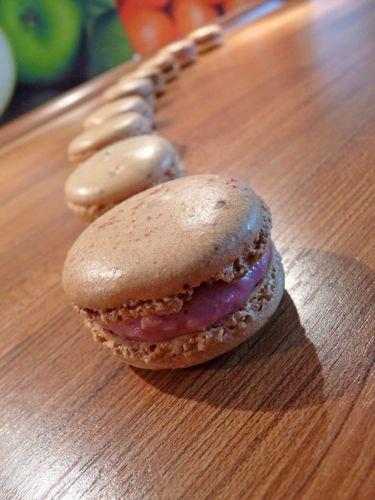
I had actually made some coffee chocolate ganache for the filling, but the stuff took forever to cool down and harden and I was on a timetable, so I had to improvise. I filled some of them with lemon curd, some with peanut butter mixed with a couple of teaspoons of melted chocolate, some with raspberry jam and some with a mix of raspberry jam and coconut bread-spread (for the Germans: REWE's "Glück der Tropen"). The fillings all went really well with the subtle vanilla flavor of the shells and the peanut-butter-chocolate ones tasted especially great on the next day when the flavor had had some time to settle.
Bon appetit!
♥ Nicole
Abonnieren
Posts (Atom)