To give you a bit of a frame of reference here: until last Wednesday, I had worked with fondant exactly twice. Both times on cakes smaller than an average spring pan. I had never made a tiered cake. And the biggest cake I had ever made was probably my former boss's birthday cake, which had 4 layers, but was still the size of a normal spring pan.
You see where I'm going with this, right?
The party was Friday night, so I went shopping on Tuesday (and seriously, the looks you get at the grocery store when you buy 150 eggs and 8kg of butter - I mean, it's not that uncommon), was planning to bake on Wednesday and fill and decorate the cakes Thursday and Friday. I was totally convinced I had bought way too much stuff for the cake.
First mistake.
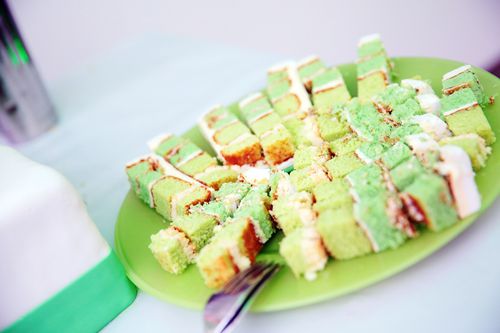
Wednesday night I had my first mini-breakdown, because of course I had way too little cake for the size I had planned for. Plus, my go-to-chocolate cake recipe that even has "perfect for layer cakes!" scribbled in the margins of my recipe book failed me for the first time ever. Seriously, "Murphy" should be my middle name. So around midnight I finally had a plan worked out on how to rescue the cake...which I discarded again around 7am the next morning. I finally decided on losing a tier and just making the bottom tier out of two different cakes to give it some height. Then I got my ganaches out of the fridge to start filling the first cakes.
Any my white ganache had totally curdled. Again. (This always happens!! What am I doing wrong?!) So two hours of chopping chocolate all for nothing and no plan B in sight. About 5 pounds of emergency buttercream and 6 hours later I had finally filled all the cakes and crumbcoated them. Of course since all my cakes were totally falling apart, I had to completely scale back on my cream fillings and up the buttercream/ganache portion in the hopes that that stuff would basically glue them together.By this point, everything non-cake-essential (meaning: all my normal groceries) had to leave the fridge because there wasn't any space left.
So sometime that afternoon I started covering the first cakes in fondant and - as I had pretty much expected by that point - that didn't go as smoothly as I had planned either. I was using Satin Ice instead of Wilton fondant for the first time and first found it very sticky only for it to completely crack when I covered the cake with it. I'm pretty sure it was me doing something wrong, I just have no idea what it was. Did I knead too long? Not long enough? Should I have used some GumTex to make it more pliable? No idea.
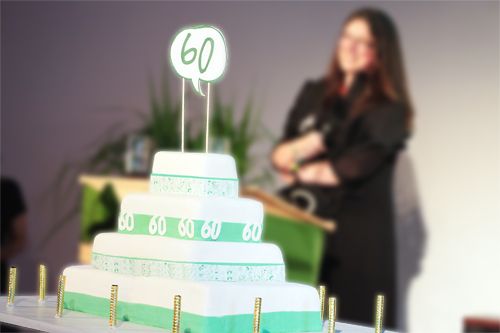
Anyway. Since my crumbcoating skills leave something to be desired as well, the fondant was anything but smooth, but by that point I honestly didn't care anymore (okay, that's a total lie, but I couldn't do anything about it, so I had to move on). After I had covered three of the layers, I wanted to color a bit of fondant green for the decoration and let me tell you, I used almost an entire bottle of gel coloring, but do you think the silly stuff turned the green I wanted? Of course not. It stayed a minty pastel instead of turning a nice dark green. I could have lived with that, but when I started rolling the fondant out and cutting strips to cover the cake with, suddenly the fondant wasn't all cracking and sticky anymore - noooo, now it had the consistency of chewing gum. So instead of a nice even strip of green around the cake, I had a completely uneven...something. I attached the fondant paper anyway and just hoped everyone would be drunk enough at the party so they wouldn't actually see it.
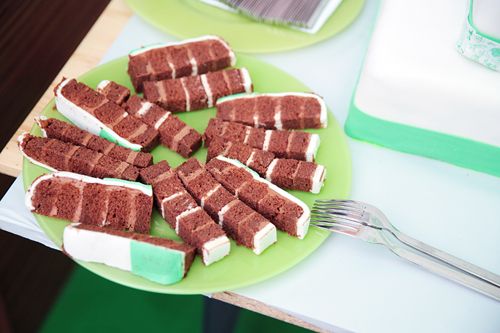
When I got up Friday morning, I felt like someone had run me over. Holy sh..., I've never been this sore from baking a cake. It felt like I'd built a house, not a cake. I still had to cover the bottom layer with fondant and finish my decorations, though, so I had to get up anyway....only to realize that I had no space anywhere to roll out the fondant as big as I needed to cover the whole layer (not too mention: how do you roll out fondant to that size (about 100x80cm) while keeping it even? And how do you move it after you've managed to roll it out?) In the end I decided to cover the two cakes separately, also because they would fit back into the fridge until the caterer picked them up that way, which was a plus considering the temparatures (but also looked very, very amateurish).
Shortly before the caterer came by to pick up the cake I arranged the bottom layer on the cake board we had made - only to realize when we wanted to bring the cake outside that the board didn't fit through my kitchen door. Let me tell you, I was dying inside when we had to start tilting the board to get it through the door, but alas, we made it without the cake ending on the floor.
I will spare you the story of how the caterer transported my poor cake. Let me just say, I refused to be left behind and insisted on him taking me with him, because I didn't trust him with the cake after I'd seen the vehicle it was transported in (not to mention that he ripped of half of my specially printed fondant paper while putting the cake in the car - thank you very much). I'll also spare you the story of what happened when we got to the party. Let's just say I was pretty close to a complete meltdown before the cake was finally assembled and found it's rightful place on the dessert buffet.
In the end, I was happy the cake arrived (mostly) safe and sound and people seem to have liked it (it even ended up being featured in the trade press as part of the anniversary coverage), so all's good. I still think I should have done a lot better, though, and I'm still kind of embarrassed by all the flaws the cake had.
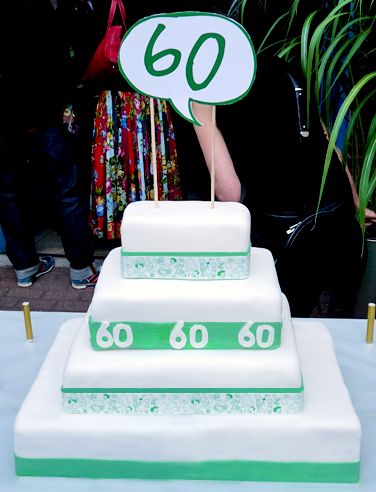
So the next time someone asks me to make a cake for 300+ people and I'm tempted to say yes? Please someone whack me with a baking tray.
♥ Nicole