Posts mit dem Label cake werden angezeigt. Alle Posts anzeigen

2014/07/15

Nutty Cherry Chocolate Cake


Someone riddle me this: everybody says they love cake, but everybody also says that they don't like sweet stuff. Alright. That's just not working for me. How can you like cake and not like sweet things? I get it, there can be too much sugar in a cake, but come on! Talk like that just makes my job harder, because every time I bake a birthday cake I sit at home, wrecking my brain on how to make a cake that's still an actual cake without eliciting moans of "It's good, but....". I think with this one, I succeeded. Everybody told me they loved how it was chocolatey, but not overly sweet. Thank god they all didn't know the list of ingredients, because while there's not a lot of sugar in it, there's definitely a lot of fat. But hey, you can't have everything, people. The taste needs to come from somewhere....


Nutty Cherry Chocolate Cake

For the cake:
250g butter, softened
5 eggs
250g white sugar
3 tsp. baking powder
200ml milk
400g hazelnut meal
(a couple of tablespoons of breadcrumbs for the pan)

For the filling:
1 glass (about 700ml including the juice) morello cherries
250g Mascarpone
400g sour cream
25g vanilla sugar (yes, 25g. That's all the sugar it needs.)
300g Nutella (...and that is why 25g of sugar is all this cake needs)
200g whipped cream

For decoration:
about a dozen fresh cherries
50g melted milk chocolate
250g chopped almonds

1. With an electric mixer, beat the butter and sugar until well combined. Separate the eggs and add the egg yolks one at a time and beat about a minute after each addition.

2. Mix the flour and the baking powder and add to the butter mixture. Beat until well combined.

3. Lower your mixer setting to a medium speed and slowly add the milk, then the hazelnut meal.

4. Beat the egg whites until stiff and fold unter the batter.

5. Line the bottom of a 9-inch spring pan with baking paper and generously grease the sides, then sprinkle breadcrumbs over the sides.

6. Bake at 200°C for about 45 to 50 minutes.

7. With an electric mixer, beat the mascarpone, sour cream, vanilla sugar and nutella until well combined.

8. Whip the cream and fold into the mascarpone mix.

9. Once the cake is completely cooled, cut into two layers.

10. Add a thin layer of the mascarpone mix onto the bottom layer.

11. Thoroughly drain the morello cherries (maybe even put them on some paper towels for a bit, so the excess juice gets absorbed) and add a layer on top of the mascarpone.

12. Add more of the mascarpone mix on top, then put the second layer on top.

13. Add a thin layer of mascarpone to the top layer of the cake and put into the fridge to set a little (about an hour or 2).

14. Pan-roast the chopped almonds until they turn golden. Let them cool down completely.

15. Once the cake has set a little, frost the outside of the cake with more of the mascarpone. Gently press the chopped almonds to the outside (leave about 50g of the almonds for the cherries).

16. Melt the milk chocolate, dip the fresh cherries into it and let them set for a minute. Once the chocolate has slightly set, dip the cherries into the leftover chopped almonds and put into the fridge to set.

17. Decorate the top of the cake with the fresh cherries.


Enjoy!
♥ Nicole

2014/03/18

Bailey's Tiramisu Cake


So the other day at work, two colleagues and I invited our department to a little birthday celebration (I know, the celebrations won't end. And I wasn't even that fond of becoming a year older.), so I had to bake my...third birthday cake. (It's the last one, though, I swear.) I was a little undecided on what I wanted to do, but in the end I got "nudged" to do the tiramisu cake (the original recipe is from "Sugar & Everything Nice", but I've adapted it quite a lot to my taste over time). I've made that cake a few times before and it's usually gone within a few hours, no matter how many or few people are around to eat it. I count that as a win. If you don't like Bailey's, of course you can substitute that with whatever liqueur you like (or leave it out at all and use only hazelnut syrup instead), but I'm not a big fan of Amaretto or Kahlua, so I usually exchange these for Bailey's in every recipe I come across one of them. In this case I used hazelnut Bailey's, because I wanted the cake to have a bit of a nutty flavor and added some praline spread to one of my layers for the same reason (see tip at the end of the recipe).


Bailey's Tiramisu Cake


For the cake:
360g all-purpose flour
120g cornstarch
4 tsp baking powder
1/4 tsp baking soda
1/2 tsp salt
300g softened butter
300g sugar
6 large eggs
2 large egg yolk
3 tsp vanilla extract
360ml buttermilk

For the Espresso Syrup:
2 tbs instant espresso powder
2 tbs boiling water
120ml water
75g sugar
2 tbs Bailey’s

For the filling:
250g mascarpone
200g sour cream
200ml whipped cream
150g powdered sugar
2 tsp vanilla extract
3 tbs Bailey’s
2 tbs hazelnut syrup (optional)
50-100g grated milk chocolate


Cake:

1. Sift together the flour, corn starch, baking powder, baking soda and salt. Set aside.

2. Beat the butter until it’s creamy. Add the sugar and beat for about 3 minutes.

3. Add first one egg at a time, then an egg yolk at a time, beating the batter about a minute after each addition.

4. Add the vanilla extract.

5. At medium speed, add the dry ingredients and the buttermilk in 5 parts, starting and ending with the flour mix.

6. Divide the batter between two spring pans (26 to 28cm) and bake at 175°C for about 30 minutes.

7. Let the cakes cool completely, then cut each of them into two layers of the same height, giving you a total of four layers.


Espresso Syrup:

1. Dissolve the espresso powder with 2 tbs of boiling water.

2. Bring the water and sugar to a boil in a small saucepan.

3. Transfer to a bowl and stir in the Bailey’s and 2 tbs of the espresso. (Keep the rest of the espresso, we’re going to need it later on!)


Filling:

1. Put the mascarpone, sour cream, vanilla extract, Bailey’s and hazelnut syrup in a bowl and whisk until well combined.

2. Sift the powdered sugar over the mix and whisk again until combined.

3. Whip the cream to stiff peaks and fold into the mascarpone-mix.

4. Transfer about 300g of the mix to separate bowl and add some of the leftover espresso syrup to taste (and some hazelnut syrup if you want). This will be our frosting.


Assembling the Cake:

1. Soak the bottom layer of the cake with espresso syrup (just sprinkle it on with a tablespoon or brush). The cake should be fairly dense, so don’t be timid (like I always am because I’m afraid the cake is going to turn into mush), it can take quite a bit of syrup before it actually soaks through.

2. Spread some of the mascarpone mix on top (about 1 to 2cm thick) and sprinkle some grated chocolate on top.

3. Repeat with cake layer two and three. Then put the last layer on top without soaking it in syrup.

4. If you have any filling left after you’re done filling the cake, just mix it in with the frosting.

5. Frost the outside of the cake with a large spatula.

6. Decorate however you like (I used chocolate coffee beans around the sides and grated chocolate on the top).

7. Refrigerate for at least 3 hours or overnight if you want the flavor to really set in.


Tip: If you want your cake to have that little bit of extra chocolate or hazelnut flavor, you can also spread a thin layer of nutella or praline spread onto the inner two layers of cake before adding the mascarpone mix.

Enjoy!
♥ Nicole

2014/02/20

Multivitamin Cake (gluten-free)

A few weeks ago, a colleague from work had her birthday and since I’ve realized that generally people aren’t as addicted to sugar as I am, I wanted to make something for her that wasn’t as sweet as my usual stuff. So I unearthed this recipe, which I hadn’t made in years. At first I thought I had written down the recipe wrong, because there was no flour in it, but then I realized: it’s just gluten-free! Added bonus, really, as there are some people at work who always miss out on cake because they’re allergic. I tweaked the recipe a little to add a little more “whomp” to it….and liked it so much that I made it again for my own birthday a few weeks later (I told you I celebrated twice because of…reasons). So if you’re looking for something not too sweet and gluten-free but still totally delicious – you’ve come to the right place.


You can decorate this however you want. You probably wouldn’t have realized the two cakes I made were the same until you cut them (which was mostly because I screwed up my piping on the first cake and had to, yes, improvise), so feel free to try whatever you want on that. The first cake I made wasn’t decorated at all around the sides, because I had to transport it to work and I like to that in a spring pan, so I concentrated on (and screwed up) the top. Since my birthday cake wasn’t going anywhere, though, I concentrated more on the sides. The original recipe calls for a layer of cream and some advocaat (which is basically spiked eggnog, just nastier) to be sprinkled over the top, but I hate that stuff, so I never do it. I could go for the eggnog version, though, if you make it around Christmas.

And another note: The cake recipe is supposed to be for a 28cm spring pan, but to be quite honest: I usually take 1.5 times the recipe if I use a large spring pan to give it a little more height. You don’t need to double the filling, though.


Multivitamin Cake (gluten-free)

For the cake:
200g almond meal
100g white sugar
100g chocolate chips
80g butter
5 eggs
1 tsp baking powder (make sure it’s gluten free if you want the recipe to stay gluten free)
1 tbsp rum (optional)

For the filling:
about 100-150g canned mandarins (one small can should suffice; don’t use fresh ones)
500g quark
100g sugar
200g whipped cream
2 p. (about 15g) vanilla sugar (alternatively: ½ tsp vanilla extract)

For the topping:
½ l multivitamin juice (if you can’t get any: take orange, passionfruit or mango juice)
100g whipped cream
1-2 ripe bananas
3 p. (about 45g) white clear glaze (for the Germans: Tortenguss; if you can’t get that, use 1 p. = 15g or 6 sheets of gelatin)
1-2 tsp lemon juice


1. Preheat your oven to 180°C.

2. Line the bottom of a spring pan with baking paper and lightly grease the sides.

3. Divide the egg whites from the yolks and whip the egg whites to stiff peaks, adding about 20g of sugar while you whip.

4. In a separate bowl, cream the butter and slowly add the egg yolks, sugar, baking powder, almond meal, chocolate chips and rum, beating the batter well after each addition.

5. Fold the egg whites into the batter.

6. Bake for about an hour or until a toothpick inserted in the middle comes out clean.

7. Let it cool completely before cutting it into two layers.


8. Whip the cream, adding the vanilla sugar as you go. Set aside. (If you use vanilla extract, don’t add it to the cream, add it in the next step to the quark.)

9. Mix the quark and sugar until it’s well combined. Fold in the whipped cream.

10. Drain the mandarins and dry them as best as possible using some paper towels. Then fold them into the quark mix.

Please use a cake ring for these next parts:

11. Spread the quark mix onto the bottom layer of the cake and put the second layer on top.

12. Cut the banana(s) into equally thick slices (about ½ cm) and sprinkle some lemon juice on top. Arrange them evenly on the top layer of the cake (leave about 1-2 cm space on the outer edge).

13. Put the juice in a pot and add the clear glaze. Bring to a boil, constantly stirring the mixture. (If you use gelatin: heat up the juice, but don’t let it come to a boil. Take it off the stove and add the gelatin. Stir until dissolved.)

14. Pour the juice on top of the bananas. (This is why it’s important to use a cake ring.)

15. Let the juice cool down a little, then put the cake into the fridge until the juice has thickened.

16. Decorate however you like!


Enjoy!
♥ Nicole

2014/02/18

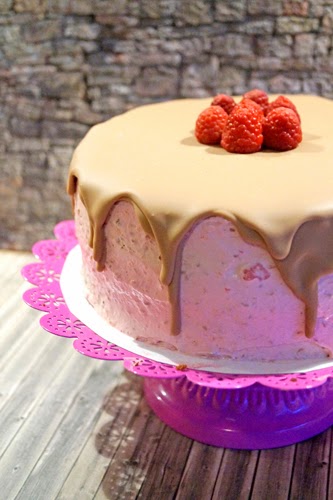
Chocolate Raspberry Cake (a.k.a. the botched Kinderriegel Cake)

So last week…or the week before…no idea anymore…I celebrated my birthday for the second time (not that I’m still at an age where your birthday is something you look forward to) and I wanted to make one of my all-time favorite cakes: a Kinderriegel Gateau. You know Kinderriegel? Milk chocolate bars with a milk center? Heavenly. And the cake seriously tastes just like the bars. Love it.


But knowing me, you all know what comes next: Right. Didn’t work out the way I planned it, because for some reason, my chocolate cream curdled. Which it has never done before. Sometimes I really wish I knew more about how baking worked so I actually knew why this stuff keeps happening to me so I can avoid it in the future.

Anyway. So, I had to improvise (really, this blog should be called “A study in improvisation” or something). Fortunately, I still had some stuff at home to make a raspberry cake out of the chocolate cake and that one at least turned out rather yummy if I’m allowed to say so myself.


Raspberry Chocolate Cake (with a hint of Kinderriegel)


For the cake:
150g all-purpose flour
150g white sugar
150g butter
1 p. vanilla sugar (if you don’t have any, use ½ tsp vanilla extract)
100g melted chocolate (in this case: Kinderriegel if you have access to them)
6 eggs
2 tbsp. dutch cocoa
2 tbsp. baking powder

For the raspberry filling:
400g sour cream
500g quark
100ml whipped cream
100g white sugar
3p. vanilla sugar
3-4 cups of raspberries (fresh or frozen)
gelatin (6 to 8 sheets or 1 p. of gelatin powder)


For the decoration:
a few raspberries
about 100-140g of melted (milk) chocolate (5-7 Kinderriegel)


1. Beat the butter with an electric mixer until it’s light and fluffy. Slowly add half of the sugar, the vanilla sugar, melted chocolate and cocoa and mix well after each addition.

2. Add two whole eggs and four egg yolks.

3. Mix the flour and baking powder and add slowly.

4. Whip the egg whites to a stiff peak, slowly adding in the rest of the sugar, and fold into the batter.

5. Line a spring pan (28cm) with baking paper on the bottom and use some cooking spray or butter to grease the sides lightly. Pour in the batter.

6. Bake on 180°C for about 40 minutes or until a toothpick inserted into the middle comes out clean.

7. Let the cake cool for half an hour, then cut it into two layers.


8. Beat the cream to stiff peaks.

9. Put your raspberries through a food processor, leaving a few aside for decoration (I used frozen raspberries, so of course I had to thaw them first). I don’t mind eating raspberry seeds, so I didn’t do anything else, but if you don’t want the seeds in your cake or are looking for a smoother finish when frosting the cake, strain the raspberries through a sieve after puréeing them.

10. If you don’t have gelatin that works on cold liquids, warm up your raspberries (in a microwave or on the stove) and add the gelatin, stirring constantly until it’s completely incorporated. If your gelatin works on cold liquids, you can stir it in without having to warm up the raspberries.

11. Beat the quark and sour cream with an electric mixer, adding the sugar and vanilla sugar while beating.

12. Add the raspberries to the quark and beat until well incorporated.

13. Fold in the cream (if you had to warm up your raspberries, wait until the mix has cooled down a little).


14. Spread about 2/3 of the cream onto the bottom layer of the cake and put the second layer on top. Use the rest of the filling to frost the outside of the cake. If you feel like your filling isn’t firm enough to frost the cake immediately, put the cake into the fridge for an hour or two before you start frosting.

15. Put the cake into the fridge for a couple of hours so the filling and frosting can set properly.

16. Melt the chocolate, but let it cool down until it starts to thicken again before pouring it over the cake. Use an angled spatula to even it out if necessary.

17. Decorate with some raspberries or whatever else you like.


Enjoy!
♥ Nicole

2013/08/27

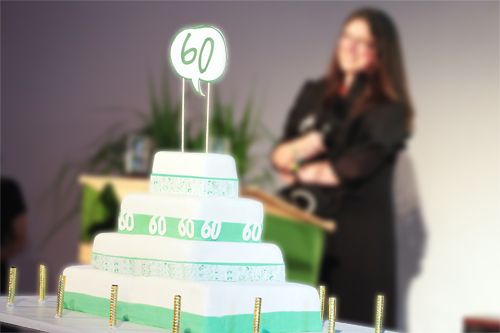
The Most Unprofessional Professional Cake Ever (or: how Nicole totally overestimated her skills)

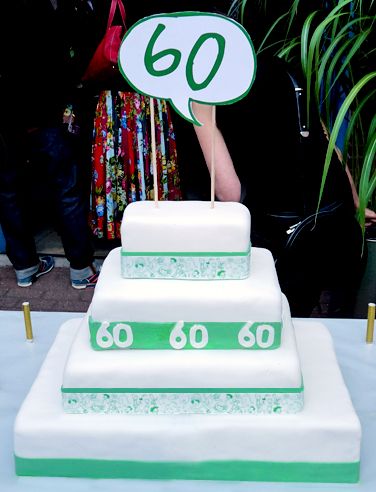
So at my old workplace I was known for the birthday cakes I made for colleagues at least a couple of times a month. So when the company's 60th anniversary rolled around, they asked me whether I'd feel up to making the cake for the anniversary party - with 350+ guests, even though I don't even work there anymore. And totally floored by the honor of being asked I was like "Sure, no problem at all. Cake for 350 people? Coming right up."

(c) Nina Stiller (edited by me)

To give you a bit of a frame of reference here: until last Wednesday, I had worked with fondant exactly twice. Both times on cakes smaller than an average spring pan. I had never made a tiered cake. And the biggest cake I had ever made was probably my former boss's birthday cake, which had 4 layers, but was still the size of a normal spring pan.

You see where I'm going with this, right?

The party was Friday night, so I went shopping on Tuesday (and seriously, the looks you get at the grocery store when you buy 150 eggs and 8kg of butter - I mean, it's not that uncommon), was planning to bake on Wednesday and fill and decorate the cakes Thursday and Friday. I was totally convinced I had bought way too much stuff for the cake.

First mistake.

(c) Nina Stiller

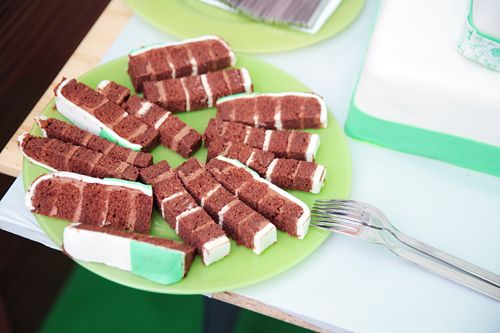
Wednesday night I had my first mini-breakdown, because of course I had way too little cake for the size I had planned for. Plus, my go-to-chocolate cake recipe that even has "perfect for layer cakes!" scribbled in the margins of my recipe book failed me for the first time ever. Seriously, "Murphy" should be my middle name. So around midnight I finally had a plan worked out on how to rescue the cake...which I discarded again around 7am the next morning. I finally decided on losing a tier and just making the bottom tier out of two different cakes to give it some height. Then I got my ganaches out of the fridge to start filling the first cakes.

Any my white ganache had totally curdled. Again. (This always happens!! What am I doing wrong?!) So two hours of chopping chocolate all for nothing and no plan B in sight. About 5 pounds of emergency buttercream and 6 hours later I had finally filled all the cakes and crumbcoated them. Of course since all my cakes were totally falling apart, I had to completely scale back on my cream fillings and up the buttercream/ganache portion in the hopes that that stuff would basically glue them together.By this point, everything non-cake-essential (meaning: all my normal groceries) had to leave the fridge because there wasn't any space left.

So sometime that afternoon I started covering the first cakes in fondant and - as I had pretty much expected by that point - that didn't go as smoothly as I had planned either. I was using Satin Ice instead of Wilton fondant for the first time and first found it very sticky only for it to completely crack when I covered the cake with it. I'm pretty sure it was me doing something wrong, I just have no idea what it was. Did I knead too long? Not long enough? Should I have used some GumTex to make it more pliable? No idea.

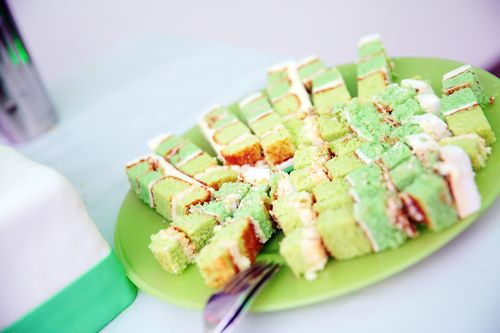
Anyway. Since my crumbcoating skills leave something to be desired as well, the fondant was anything but smooth, but by that point I honestly didn't care anymore (okay, that's a total lie, but I couldn't do anything about it, so I had to move on). After I had covered three of the layers, I wanted to color a bit of fondant green for the decoration and let me tell you, I used almost an entire bottle of gel coloring, but do you think the silly stuff turned the green I wanted? Of course not. It stayed a minty pastel instead of turning a nice dark green. I could have lived with that, but when I started rolling the fondant out and cutting strips to cover the cake with, suddenly the fondant wasn't all cracking and sticky anymore - noooo, now it had the consistency of chewing gum. So instead of a nice even strip of green around the cake, I had a completely uneven...something. I attached the fondant paper anyway and just hoped everyone would be drunk enough at the party so they wouldn't actually see it.

(c) Nina Stiller

When I got up Friday morning, I felt like someone had run me over. Holy sh..., I've never been this sore from baking a cake. It felt like I'd built a house, not a cake. I still had to cover the bottom layer with fondant and finish my decorations, though, so I had to get up anyway....only to realize that I had no space anywhere to roll out the fondant as big as I needed to cover the whole layer (not too mention: how do you roll out fondant to that size (about 100x80cm) while keeping it even? And how do you move it after you've managed to roll it out?) In the end I decided to cover the two cakes separately, also because they would fit back into the fridge until the caterer picked them up that way, which was a plus considering the temparatures (but also looked very, very amateurish).

Shortly before the caterer came by to pick up the cake I arranged the bottom layer on the cake board we had made - only to realize when we wanted to bring the cake outside that the board didn't fit through my kitchen door. Let me tell you, I was dying inside when we had to start tilting the board to get it through the door, but alas, we made it without the cake ending on the floor.

I will spare you the story of how the caterer transported my poor cake. Let me just say, I refused to be left behind and insisted on him taking me with him, because I didn't trust him with the cake after I'd seen the vehicle it was transported in (not to mention that he ripped of half of my specially printed fondant paper while putting the cake in the car - thank you very much). I'll also spare you the story of what happened when we got to the party. Let's just say I was pretty close to a complete meltdown before the cake was finally assembled and found it's rightful place on the dessert buffet.

In the end, I was happy the cake arrived (mostly) safe and sound and people seem to have liked it (it even ended up being featured in the trade press as part of the anniversary coverage), so all's good. I still think I should have done a lot better, though, and I'm still kind of embarrassed by all the flaws the cake had.


So the next time someone asks me to make a cake for 300+ people and I'm tempted to say yes? Please someone whack me with a baking tray.

♥ Nicole

2013/08/20

The best carrot cake ever

I admit it, the longer I've been finding my recipes online, the more I started totally discriminating against food blogs that don't have pretty pictures. If I see a recipe that sounds good at first glance, but is accompanied by crappy pictures, I immediately assume the food tastes crappy as well. Which is kind of ironic, considering. Maybe even a bit hypocritical. But anyway.


Thank god I wasn't always like that, because once upon a time when I didn't care how a picture looked (meaning: when I hadn't really seen any great food blogs yet), I stumbled upon this carrot cake recipe. It came with a pretty crappy picture (seriously, could have been one of my own), but I gave it a try nonetheless.

Best decision ever. This has become my go-to recipe; I've even thrown away all other carrot cake recipes I had, because this is the only one I will need for the rest of my life. I've made it countless times now and it has never failed me. Nor has it ever disappointed anyone who's eaten it. It's delicious. And easy to make, too! What more could you want?

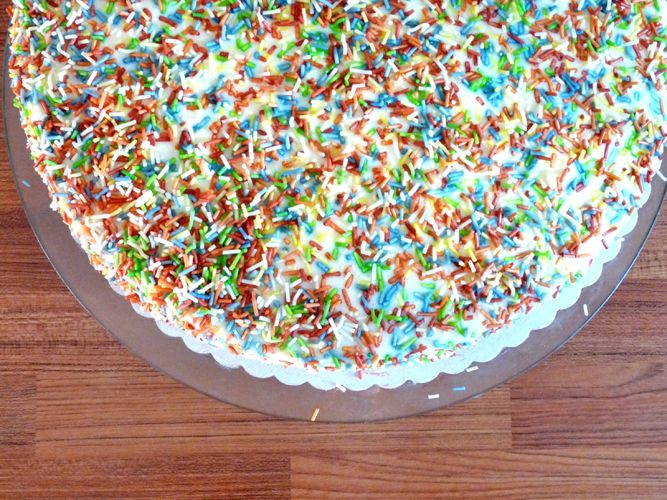
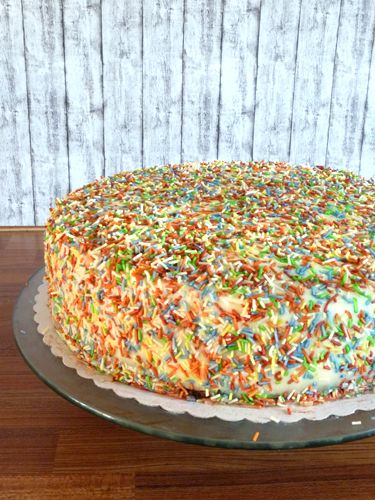
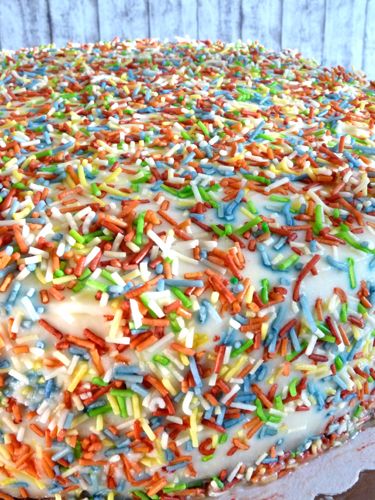
This one I made for a colleague's birthday. The sprinkles turned out tasting horrible, but thankfully their taste was totally overpowered by the awesomeness that was the rest of the cake. I had hoped it would turn out a bit prettier, but well, guess I can't have everything.

I've adjusted the original recipe somewhat, because (as always it seems), it had waaaay too much sugar for my taste and I usually add in an extra carrot or two. The original also has pecans in it, but as it's practically impossible to find pecans here and for some reason they get this really burned taste when I use them in this cake, I usually just leave them out. Around Christmas, I like to crumble up some speculoos and put it in the batter, though. The cake tastes best the first couple of days after baking, but I've eaten it for up to 5 days after I baked it and it still tasted great and didn't go bad, so that's always a plus.


Carrot Cake

For the cake:
4 eggs
300ml vegetable oil
300g sugar
2 tsp vanilla extract
250g flour
2 tsp baking soda
2 tsp baking powder
1/2 tsp salt
3 tsp cinnamon
about 5 big carrots


For the frosting
200g cream cheese
200g Creme fraîche or sour cream
100g butter
2 tsp vanilla extract
50g powdered sugar


Cake

1. Grease a 28cm spring pan and line the bottom with baking paper. If you have two spring pans, use both and divide the batter between them. Saves you from having to cut the cake later.

2. Preheat your oven to 175°C.

3. Mix the flour, cinammon, baking powder, baking soda and salt.

4. Finely grate your carrots.

5. Beat the eggs, oil, vanilla and sugar together in a big bowl.

6. Add the flour mix and mix until just incorporated.

7. Fold in the grated carrots.

8. Pour the batter into your spring pan (if you got 2 pans, divide it evenly between the pans).

9. Bake for about 45 to 50 minutes or until a toothpick inserted into the center of the cake comes out clean. Don't test too early if the cake's done, though! If you stick in your toothpick too early, the whole cake will deflate!

10. Let it cool. If you only used one pan, cut the cake in the middle so you get two layers.


Frosting

1. Make sure your cream cheese, creme fraîche and butter are room temperature.

2. Mix all the frosting ingredients together in a bowl and beat until you get a smooth mixture.


Assembly

1. Generously frost one of the cake layers, then put the second layer on top and frost the outside of the cake.

2. Decorate however you want!


Bon appetit!

♥ Nicole


2013/07/15

Lemon Berry Gateau

Aaaaah, summer. Just when I was almost convinced that I wouldn’t be seeing any of you this year, you decided to make an appearance. Finally. And of course, right when it starts getting warm outside, I decide to start baking again. Go figure. Especially since I’m not exactly known for my pound cakes and pies, but rather for my…let’s say “cream-heavy” creations. But: even a creamy gateaux can be adjusted to be fresh and less heavy for a warm summer day (…and less likely to turn sour from one minute to the next) by substituting only a few ingredients.


This cake is as versatile as they come and you can pretty much adjust the filling ingredients however you want (or depending on whatever you can get wherever you live). I used a recipe for the sponge, but for the lemon and berry cream, I just threw some things together into a bowl. You can use quark, cream cheese, natural yoghurt, mascarpone, sour cream, or whatever floats your boat and just flavor it to taste. I tried to make mine a little lighter and less sweet than a “regular” cake and I thought it tasted fresh and fruity without being overpowering on a warm day.

Also, I’ve made the experience that many of the internet recipes I use are about 80% sugar (at least that’s what it feels like) and even though I have a higher tolerance for sugar than most people I know (Really, I do. You should see the looks I get sometimes when I go for the fourth piece of cake.), I’ve realized that most cakes work with about a third of the sugar stated in the recipe (sometimes even less). You don’t even have to substitute it with Stevia or something, just leave it out, especially in fillings (you have to be a little more careful when it comes to the cake batter). So this is what I did here (and what I usually do when I do creamy fillings): I just put sugar in a tablespoon at a time and tasted between each spoon. Then I stopped as soon as I felt it was sweet enough. So the measurements in the recipe can be seen as guidelines: they worked well for me, but feel free to adjust them to your own taste.


Lemon Berry Gateau

For the sponge:
4 eggs
140g sugar
120g flour
1 tsp baking powder

For the filling:
750g Quark (Magerquark, 10% fat)
300ml whipping cream (I used Cremefine, which is a whipping cream substitute with less fat)
5 tbsp powdered sugar
1 tbsp vanilla essence
2 tbsp lemon juice
4 tbsp lemon curd
7 heaped tbsp gelatin powder (we need gelatin that dissolves in COLD liquids)
300g mixed frozen berries (my mix had raspberry, blackberry, blueberry, and red currant)

As I said, you can substitute pretty much everything in this cake. Don’t have quark where you live? How about a low-fat cream cheese? You prefer the taste of real whipping cream? Go for it! 4 tbsps of lemon curd isn’t lemony enough for you? Put in a whole glass if you like!

Sponge

1. Beat the eggs and the sugar until the mixture has tripled in volume.

2. Sift the flour and baking powder and fold slowly into the egg mixture.

3. Line two spring pans (mine were 28cm I think) with baking paper and evenly divide the batter between the two pans.

4. Bake at 190°C for about 10 minutes or until golden brown on top. Let the cakes cool completely before filling them.


Filling

1. Unfreeze your frozen berries in a bowl at room temperature. If they’re still a bit frozen when you want to use them, don’t worry.

2. Put the berries into a pot and slowly warm them up. Stir frequently to make sure they don’t start sticking to the bottom of the pot. Let them simmer for a few minutes until they’re really soft and heated.

3. Puree the fruit (I used a hand blender) and put it through a fine strainer (because we only want the pulp, not the skins). Put aside.

4. Put the quark in a bowl and add the vanilla essence, lemon juice and powdered sugar. Mix well.

5. Whip the whipping cream (or, in my case: the low-fat-whipping-cream-substitute) and fold into the quark mix.

6. Divide the quark mix in half. Mix the lemon curd into one half of the mix, then add about 3 heaped tablespoons of gelatin and mix well.

7. Fold the cooled berry puree into the other half of the quark. Add about 4 heaped tablespoons of gelatin and mix well.


Assembly

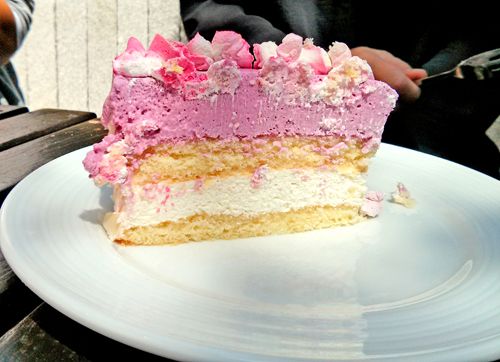
1. Fit one layer of the sponge into a cake ring. Pour the lemon quark on top and smooth out. Put the second layer of sponge cake on top and press down slightly until everything is nice and even. Pour the fruity quark on top and smooth out as well.

2. Put into the fridge for at least a couple of hours until everything has had a chance to set before you start decorating the outside.

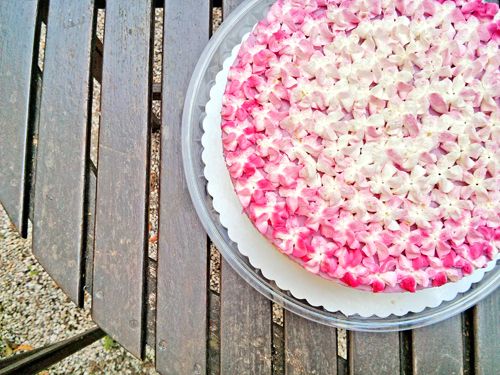
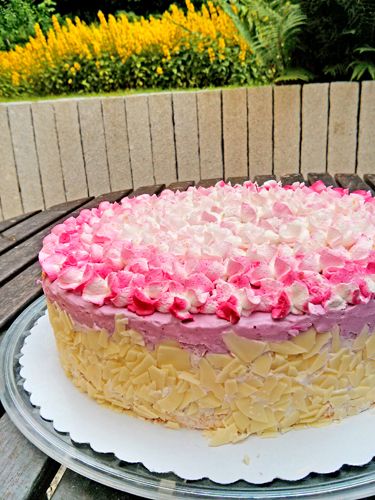
3. Decorate the outside however you like. I used about 100ml of whipping cream (substitute) and piped some two-tone flowers on top and then used to rest to lightly crumb-coat the sides so my white chocolate flakes would stick.

4. Put back into the fridge until you’re ready to eat! (Overnight would be best, so the flavors have some time to really develop, but you can eat it after a couple of hours if you don't want to wait.)


While making this cake, I also realized I have a new problem: since 98% of the cakes I make are for other people’s birthdays, I’m really getting into photography trouble here. The cake was done sometime around 10 at night, so it was too dark to take pictures. The next morning I got up half an hour early to quickly take some pictures before work, but the light was so horrible that the pictures turned out all blurry and dark and I didn’t have a lot of time before I had to get going, so I had to take a few quick snaps with my cellphone right before it was eaten. And this is going to be pretty par for the course for the foreseeable future I’m afraid. (Had the same problem again this morning with another cake.) Anyway, I’ll try my best to give you some halfway decent pictures at least.

Enjoy!

♥ Nicole

2013/06/21

Strawberry Cardinal


I haven't really gotten around to baking something in the past few weeks, because I've been somewhat preoccupied with sewing. Well, and there wasn't really anyone who could've eaten it with me. And I'm on somewhat of a half-assed diet again (and really, when am I not?).

So today I visited my former work place, so I used the chance of knowing there were plenty of people who I could share with (and who usually were very keen on eating my cakes) and finally made something again. I realize it may not look like much, but don't judge a book by its cover (Heh. A publishing pun.)...or in this case, a cake by its outside - it's aaaaall on the inside.


The base and top each are a layer of sponge and a layer of meringue. The bottom layer is soaked in lemon curd and topped with vanilla whipped cream and strawberries. Sound better now?

I have no idea idea why this is called a strawberry cardinal, by the way. Just go with it.


Strawberry Cardinal

For the sponge:
2 eggs plus 4 egg yolks
80g flour
1/2 tsp of baking powder
70g of powdered sugar

For the meringue:
4 egg whites
100g sugar

For the filling
2 tps lemon curd
300-400g of strawberries (well, basically as many as you want to be in there)
250ml vanilla whipped cream (alternatively: whipped cream plus 2 pkg. of vanilla sugar or 1/2 tsp of vanilla extract)


1. Whisk the eggs, egg yolks and the powdered sugar with an electric mixer until they have tripled.

2. Sift the flour and powdered sugar on top and carefully fold in until it's just incorporated.

3. Divide the dough between two 28 or 30cm greased springform pans.

4. Mix the egg whites for a minute, then slowly add the sugar and continue whisking until a fairly firm meringue has formed (it doesn't have to be super stiff, though, or you won't be able to spread it on the dough).

5. Divide the meringue between the two pans, and spread it over the dough.

6. Bake on 150°C for about 20 to 30 minutes.

7. Whip the vanilla whipped cream, cut up the strawberries into small pieces and mix the two.

8. When the cakes are completely cooled, spread a thin layer of lemon curd on the bottom layer, spread the whipped cream on it and put the second cake layer on top.

9. Sprinkle with powdered sugar right before serving. (Or decorate with whipped cream and more strawberries. Basically, be a lot more creative than I was!)


Bon appetit!


♥ Nicole

2013/05/03

Kind of a "best of", part 2

Alright, where were we? Fondant! Right. So since I really enjoyed the fondant course, I did a second course at the same place, this time tackling edible flowers...


Well, let me just tell you: I'm a rose girl through and through. Who needs lilies anyway? Even though they might look a lot easier to make, they're not. The roses on the other hand I loved. So much apparently that I smashed one of the kitchen floor not 10 minutes after these pictures were taken. Good thing I'm a bit of an overachiever and did two during the course.


Cookies! I LOVE cookies. For some reason, though, I only seem to make them on Christmas. But then I usually go to town and spend days in the kitchen until I'm satisfied. Fortunately for me, my old workplace had a Christmas tradition where you could bring in Christmas cookies, people could buy them and the money got donated to a good cause. So fortunately for my hips, I didn't have to eat all of this by myself (...and that was only a little part of what was actually there):


Another one of my obsessions is peanut butter...


Mind you, I hate the stuff right out of the jar. It needs to either be incorporated in any type of baked good or come in a package that says "Reese's". These were Peanut Butter Choc Chip Cupcakes with a Peanut Butter Cream Cheese Frosting. Hmmm....Peanut Butter...


This was the birthday cake I made for my other former boss. It was probably one of the more involved cakes I've ever made. It had a chocolate base (...I just realized that apparently I only take pictures of all the cakes that have chocolate in them. I swear, I do make non-chocolate cakes occasionally), white choc and hazelnut ganache, chocolate panna cotta and red berry mascarpone mousse as well as a raspberry glaze. It was enclosed in a thin sheet of chocolate and I even made the decorations myself (which I'm very proud of, even though that was probably the easiest part of the whole cake).

Alright, I think that's enough for now. As I said in part 1, I hope to actually start blogging for real very soon, but bear with me if it takes a little while to actually find an event to bake for (if I bake for myself, I will have to eat it all myself - and my hips seriously won't thank me for it).

Thank you for stopping by!

♥ Nicole

PS: If you are interested in any of the recipes, I will try my best to find and recreate them (that is: find them in my folder of of recipes where I'm sure I've bookmarked them somewhere), so let me know if you're interested in a particular recipe!

Kind of a "best of", Part 1

So, as I haven't gotten around to baking at all lately (and let's not talk about my recent sewing misadventures...), I'm just gonna start of with a bit of a "best of" my baking adventures. Which isn't really a "best of" considering I usually forget to take pictures of most of the stuff I make. So actually, this is more of a "stuff I remembered to photograph" collection...so to speak. ANYWAY. As you will soon realize, I'm not exactly what you'd call a "good photographer" yet. At least not when it comes to food. So far, taking pictures of what I've made has mainly been an afterthought and you can really see that in a lot of pictures. I promise I will try to make more of an effort in the future (considering that now I might not be the only one looking at them yet) and, hopefully, my pictures will improve soon. What also makes taking great pictures with a nice setup a tad difficult is that I usually bake for other people's birthdays, so I can't really deliver photos of the inside of almost anything, because, well, it would be kinda rude to gift people with cakes that are missing a piece. But I'm grateful for any advice you might want to give me! No recipes yet in this post (...that'll happen as soon as I don't forget to write down what I'm doing while I'm doing it), because some of this pictures are from like, a year or two ago and I can barely remember what the stuff WAS, much less how I made it (...most of the time I barely remember what I had for breakfast). Yeah, I know, so far, I'm probably the worst food blogger in the history of food bloggers. Please forgive me. I promise to do better in the future. On basically every aspect of blogging. I swear! But let's get to the most important stuff: the food. So, what to start with?


This was an Almond & Peach Galette I did a couple of years back. First time I ever made frangipane....and I'm still preeeetty sure frangipane was neither supposed to look like that nor taste like that. Looked great, though! (And got eaten anyway. ;))


These were Coconut Cupcakes with a Peach Frosting that also did not quite turn out how they were supposed to if I remember correctly (are you starting to see a trend here?). So they got doused in coconut flakes and something pretty got popped on top and nobody even realized that that wasn't how they were supposed to look like.


My former boss's 40th birthday cake, which was a chocolate cake with orange mascarpone mousse. It had like, 5 layers and weighed over 4 pounds. The chocolate cake is my tried and tested recipe, but I wasn't too convinced when it came to the oranges. They tasted a bit bitter after a while, so next time I'd probably make it with a different fruit.


Another birthday cake, this one for a former colleague of mine. It was a bit of a joke, because she always has a big bowl of candy on her desk at the office and I probably stopped by there half a dozen times a day to get my sugar fix (which was apparently far more often than anybody else). The cake itself looked very different from the inside. It was a chocolate cake with a choc ganache and red berry mousse.


Ah, my first attempts at working with fondant. I did a course at a local shop here and this was the result and I actually quite liked how the blue one turned out. So naturally, after managing not to ruin a cake on the first try, I was convinced I'm a fondant master now and decided to make another fondant cake in honor of J.K. Rowling's new book (which I didn't realize at the time would suck - the book that is...well ok, the cake as well). Turns out: I'm not a fondant master by a long shot. Let's just leave it at that.

Alright, more in part 2! ♥ Nicole

PS: If you are interested in any of the recipes, I will try my best to find and recreate them (that is: find them in my folder of of recipes where I'm sure I've bookmarked them somewhere), so let me know if you're interested in a particular recipe!