

But knowing me, you all know what comes next: Right. Didn’t work out the way I planned it, because for some reason, my chocolate cream curdled. Which it has never done before. Sometimes I really wish I knew more about how baking worked so I actually knew why this stuff keeps happening to me so I can avoid it in the future.
Anyway. So, I had to improvise (really, this blog should be called “A study in improvisation” or something). Fortunately, I still had some stuff at home to make a raspberry cake out of the chocolate cake and that one at least turned out rather yummy if I’m allowed to say so myself.
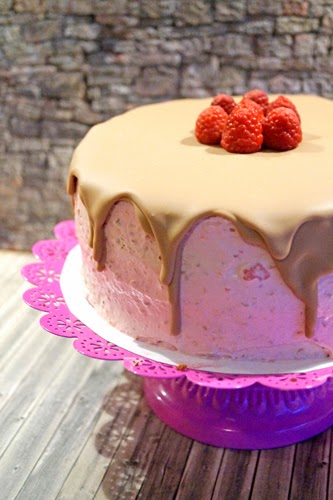
Raspberry Chocolate Cake (with a hint of Kinderriegel)
For the cake:
150g all-purpose flour
150g white sugar
150g butter
1 p. vanilla sugar (if you don’t have any, use ½ tsp vanilla extract)
100g melted chocolate (in this case: Kinderriegel if you have access to them)
6 eggs
2 tbsp. dutch cocoa
2 tbsp. baking powder
For the raspberry filling:
400g sour cream
500g quark
100ml whipped cream
100g white sugar
3p. vanilla sugar
3-4 cups of raspberries (fresh or frozen)
gelatin (6 to 8 sheets or 1 p. of gelatin powder)
For the decoration:
a few raspberries
about 100-140g of melted (milk) chocolate (5-7 Kinderriegel)
1. Beat the butter with an electric mixer until it’s light and fluffy. Slowly add half of the sugar, the vanilla sugar, melted chocolate and cocoa and mix well after each addition.
2. Add two whole eggs and four egg yolks.
3. Mix the flour and baking powder and add slowly.
4. Whip the egg whites to a stiff peak, slowly adding in the rest of the sugar, and fold into the batter.
5. Line a spring pan (28cm) with baking paper on the bottom and use some cooking spray or butter to grease the sides lightly. Pour in the batter.
6. Bake on 180°C for about 40 minutes or until a toothpick inserted into the middle comes out clean.
7. Let the cake cool for half an hour, then cut it into two layers.
8. Beat the cream to stiff peaks.
9. Put your raspberries through a food processor, leaving a few aside for decoration (I used frozen raspberries, so of course I had to thaw them first). I don’t mind eating raspberry seeds, so I didn’t do anything else, but if you don’t want the seeds in your cake or are looking for a smoother finish when frosting the cake, strain the raspberries through a sieve after puréeing them.
10. If you don’t have gelatin that works on cold liquids, warm up your raspberries (in a microwave or on the stove) and add the gelatin, stirring constantly until it’s completely incorporated. If your gelatin works on cold liquids, you can stir it in without having to warm up the raspberries.
11. Beat the quark and sour cream with an electric mixer, adding the sugar and vanilla sugar while beating.
12. Add the raspberries to the quark and beat until well incorporated.
13. Fold in the cream (if you had to warm up your raspberries, wait until the mix has cooled down a little).
14. Spread about 2/3 of the cream onto the bottom layer of the cake and put the second layer on top. Use the rest of the filling to frost the outside of the cake. If you feel like your filling isn’t firm enough to frost the cake immediately, put the cake into the fridge for an hour or two before you start frosting.
15. Put the cake into the fridge for a couple of hours so the filling and frosting can set properly.
16. Melt the chocolate, but let it cool down until it starts to thicken again before pouring it over the cake. Use an angled spatula to even it out if necessary.
17. Decorate with some raspberries or whatever else you like.

Enjoy!
♥ Nicole
This looks delicious and I'm definitely stealing the recipe. I'd love to see the original too, though, at some point. I love those tiny, addictive kinder bars!
AntwortenLöschenThank you! And I'm sure I'll post the original recipe as soon as I get around to making it. I'll probably use it for a wedding cake I have to make in May, but I'm going to have to change the filling to buttercream for that one, so it's also not gonna be the real original cake. But I'll get to it, I promise! :)
Löschen