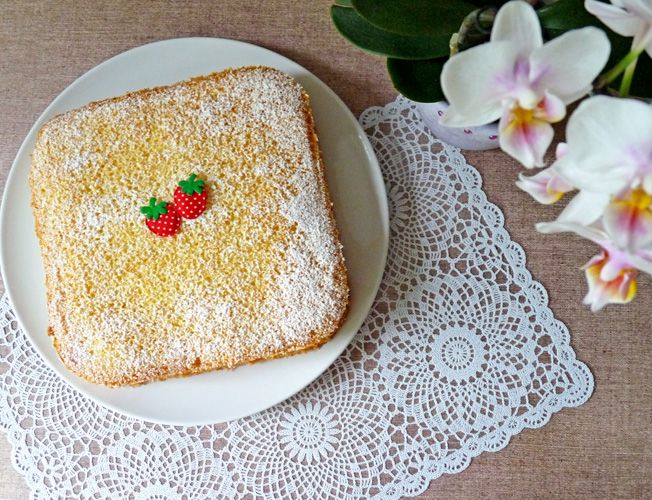
Aaaaah, summer. Just when I was almost convinced that I wouldn’t be seeing any of you this year, you decided to make an appearance. Finally. And of course, right when it starts getting warm outside, I decide to start baking again. Go figure. Especially since I’m not exactly known for my pound cakes and pies, but rather for my…let’s say “cream-heavy” creations. But: even a creamy gateaux can be adjusted to be fresh and less heavy for a warm summer day (…and less likely to turn sour from one minute to the next) by substituting only a few ingredients.
This cake is as versatile as they come and you can pretty much adjust the filling ingredients however you want (or depending on whatever you can get wherever you live). I used a recipe for the sponge, but for the lemon and berry cream, I just threw some things together into a bowl. You can use quark, cream cheese, natural yoghurt, mascarpone, sour cream, or whatever floats your boat and just flavor it to taste. I tried to make mine a little lighter and less sweet than a “regular” cake and I thought it tasted fresh and fruity without being overpowering on a warm day.
Also, I’ve made the experience that many of the internet recipes I use are about 80% sugar (at least that’s what it feels like) and even though I have a higher tolerance for sugar than most people I know (Really, I do. You should see the looks I get sometimes when I go for the fourth piece of cake.), I’ve realized that most cakes work with about a third of the sugar stated in the recipe (sometimes even less). You don’t even have to substitute it with Stevia or something, just leave it out, especially in fillings (you have to be a little more careful when it comes to the cake batter). So this is what I did here (and what I usually do when I do creamy fillings): I just put sugar in a tablespoon at a time and tasted between each spoon. Then I stopped as soon as I felt it was sweet enough. So the measurements in the recipe can be seen as guidelines: they worked well for me, but feel free to adjust them to your own taste.
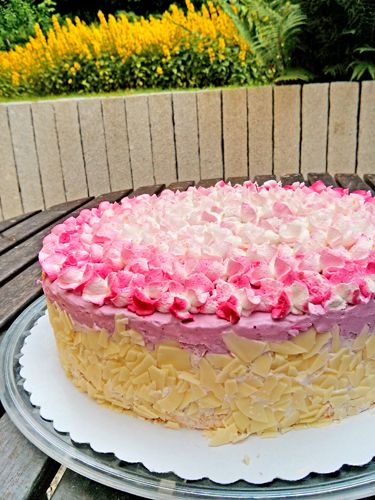
Lemon Berry Gateau
For the sponge:
4 eggs
140g sugar
120g flour
1 tsp baking powder
For the filling:
750g Quark (Magerquark, 10% fat)
300ml whipping cream (I used Cremefine, which is a whipping cream substitute with less fat)
5 tbsp powdered sugar
1 tbsp vanilla essence
2 tbsp lemon juice
4 tbsp lemon curd
7 heaped tbsp gelatin powder (we need gelatin that dissolves in COLD liquids)
300g mixed frozen berries (my mix had raspberry, blackberry, blueberry, and red currant)
As I said, you can substitute pretty much everything in this cake. Don’t have quark where you live? How about a low-fat cream cheese? You prefer the taste of real whipping cream? Go for it! 4 tbsps of lemon curd isn’t lemony enough for you? Put in a whole glass if you like!
Sponge
1. Beat the eggs and the sugar until the mixture has tripled in volume.
2. Sift the flour and baking powder and fold slowly into the egg mixture.
3. Line two spring pans (mine were 28cm I think) with baking paper and evenly divide the batter between the two pans.
4. Bake at 190°C for about 10 minutes or until golden brown on top. Let the cakes cool completely before filling them.
Filling
1. Unfreeze your frozen berries in a bowl at room temperature. If they’re still a bit frozen when you want to use them, don’t worry.
2. Put the berries into a pot and slowly warm them up. Stir frequently to make sure they don’t start sticking to the bottom of the pot. Let them simmer for a few minutes until they’re really soft and heated.
3. Puree the fruit (I used a hand blender) and put it through a fine strainer (because we only want the pulp, not the skins). Put aside.
4. Put the quark in a bowl and add the vanilla essence, lemon juice and powdered sugar. Mix well.
5. Whip the whipping cream (or, in my case: the low-fat-whipping-cream-substitute) and fold into the quark mix.
6. Divide the quark mix in half. Mix the lemon curd into one half of the mix, then add about 3 heaped tablespoons of gelatin and mix well.
7. Fold the cooled berry puree into the other half of the quark. Add about 4 heaped tablespoons of gelatin and mix well.
Assembly
1. Fit one layer of the sponge into a cake ring. Pour the lemon quark on top and smooth out. Put the second layer of sponge cake on top and press down slightly until everything is nice and even. Pour the fruity quark on top and smooth out as well.
2. Put into the fridge for at least a couple of hours until everything has had a chance to set before you start decorating the outside.
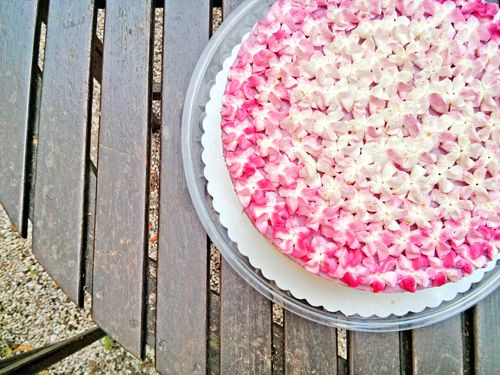
3. Decorate the outside however you like. I used about 100ml of whipping cream (substitute) and piped some two-tone flowers on top and then used to rest to lightly crumb-coat the sides so my white chocolate flakes would stick.
4. Put back into the fridge until you’re ready to eat! (Overnight would be best, so the flavors have some time to really develop, but you can eat it after a couple of hours if you don't want to wait.)
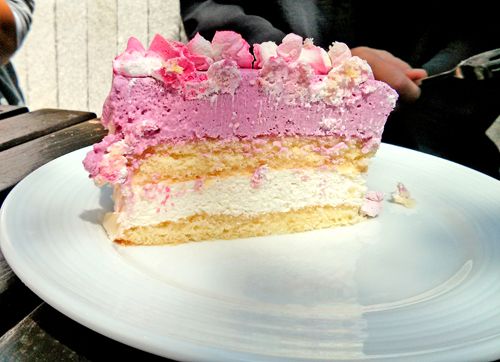
While making this cake, I also realized I have a new problem: since 98% of the cakes I make are for other people’s birthdays, I’m really getting into photography trouble here. The cake was done sometime around 10 at night, so it was too dark to take pictures. The next morning I got up half an hour early to quickly take some pictures before work, but the light was so horrible that the pictures turned out all blurry and dark and I didn’t have a lot of time before I had to get going, so I had to take a few quick snaps with my cellphone right before it was eaten. And this is going to be pretty par for the course for the foreseeable future I’m afraid. (Had the same problem again this morning with another cake.) Anyway, I’ll try my best to give you some halfway decent pictures at least.
Enjoy!
♥ Nicole
2013/07/15
2013/07/08
The Bow Clutch (or: lessons in thinking before acting)
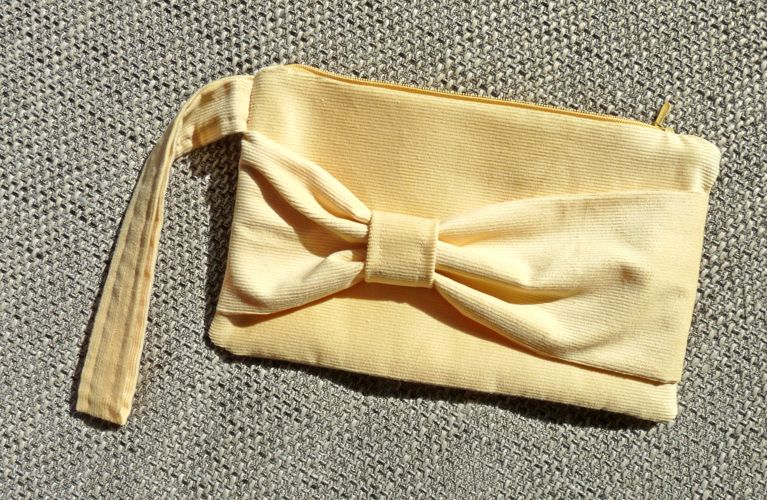
Seeing as I have imposed a clothes-sewing-embargo on myself until I have lost at least 10 pounds (...so basically, until 2036 or thereabouts), but I really felt like sewing over the weekend (don't you hate summer break when there's nothing on tv all week that you can catch up on on the weekend? And you can only read so much until you don't feel like reading anymore), I had to improvise. Good thing I saw this beautiful clutch with a bow somewhere online last week that I immediately fell in love with. Unfortunately, as I was...well, let's say "not at home" when I found it online, I couldn't really bookmark it and complete forgot where I saw it. But I knew what it had looked like, so I thought I'd give it a go without the step-by-step instructions anyway.
The thought alone should have stopped me in my tracks. I know how things turn out whenever I start thinking "Eh, I'll just wing it." I mean, the clutch looks easy enough, but I had never sewn anything with a lining, much less a lining and a zipper before this weekend. The smart thing to do probably would have been to check out a tutorial how to do that before I got started. In my defense, I did flip through my sewing books, didn't find anything on it and, again, thought: "Eh, I'll just wing it."
Needless to say, attempt number 1 didn't quite turn out how it was supposed to. Instead of cutting four pieces (two for the lining, two for the outer layer), I tried working with two ('cause really, who needs a seam at the bottom? Just one more step and it doesn't make the whole thing prettier!). Which everybody who has ever inserted a lining will tell you: won't work. Unfortunately, I only realized how much trouble I was really in when I came to the point where attaching the last part to the zipper was physically impossible, no matter how often I turned the thing. That was the point when I finally bothered to check out a video tutorial online. Well, better late than never. One epiphany later, I started over and this time, I got it right.
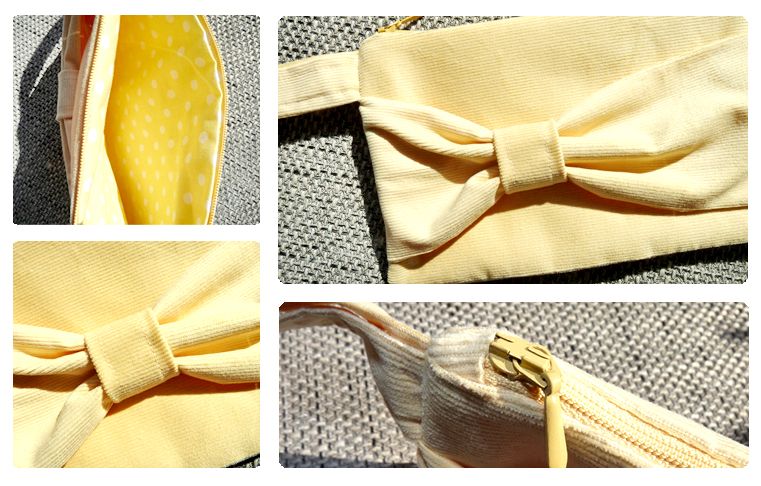
Well, as much as I can get stuff right. It turned out pretty well for me, though. I'm not 100% happy with the zipper (it kinda sticks up at one end), but everything else I'm mostly satisfied with, so: go me!
The original clutch I saw was made out of linen, but I hate linen (Seriously, it's my anti-fabric. I have never owned anything made out of linen and I swear I never will.), so I got some light yellow needlecord for it, which I adore. Unfortunately, it seems to be a lot more delicate than I thought it would be. It had some folds from the store and I swear it was impossible to iron them out completely. Plus, after turning the fabric around a couple of times, it looked pretty awful. Not to mention that you constantly have to de-lint it. But it looks pretty, so there's that.
If you want to give it a go yourself: easiest pattern ever. If anyone's interested I can write down some quick instructions (since I can't find the original anymore to link to - I'll give it another look, though!). Just let me know in the comments!
EDIT: Hah! Found it! Here are the original instructions!
The thought alone should have stopped me in my tracks. I know how things turn out whenever I start thinking "Eh, I'll just wing it." I mean, the clutch looks easy enough, but I had never sewn anything with a lining, much less a lining and a zipper before this weekend. The smart thing to do probably would have been to check out a tutorial how to do that before I got started. In my defense, I did flip through my sewing books, didn't find anything on it and, again, thought: "Eh, I'll just wing it."
Needless to say, attempt number 1 didn't quite turn out how it was supposed to. Instead of cutting four pieces (two for the lining, two for the outer layer), I tried working with two ('cause really, who needs a seam at the bottom? Just one more step and it doesn't make the whole thing prettier!). Which everybody who has ever inserted a lining will tell you: won't work. Unfortunately, I only realized how much trouble I was really in when I came to the point where attaching the last part to the zipper was physically impossible, no matter how often I turned the thing. That was the point when I finally bothered to check out a video tutorial online. Well, better late than never. One epiphany later, I started over and this time, I got it right.
Well, as much as I can get stuff right. It turned out pretty well for me, though. I'm not 100% happy with the zipper (it kinda sticks up at one end), but everything else I'm mostly satisfied with, so: go me!
The original clutch I saw was made out of linen, but I hate linen (Seriously, it's my anti-fabric. I have never owned anything made out of linen and I swear I never will.), so I got some light yellow needlecord for it, which I adore. Unfortunately, it seems to be a lot more delicate than I thought it would be. It had some folds from the store and I swear it was impossible to iron them out completely. Plus, after turning the fabric around a couple of times, it looked pretty awful. Not to mention that you constantly have to de-lint it. But it looks pretty, so there's that.
If you want to give it a go yourself: easiest pattern ever. If anyone's interested I can write down some quick instructions (since I can't find the original anymore to link to - I'll give it another look, though!). Just let me know in the comments!
EDIT: Hah! Found it! Here are the original instructions!
2013/07/04
Decorated Flower Pots
If there’s one thing I don’t have, it’s a green thumb. Flowers wilt in my presence. Leaves shrivel up and die. It’s quite disconcerting actually. I’ve stopped counting how many gerber daisies (my favorite flowers) I have killed inside of two weeks of buying them. At least a dozen orchids have stopped blooming immediately after coming into my care. I have the thumb of death when it comes to things that have the ability to sprout any type of blossom.
Well okay, that’s maybe a little bit exaggerated. Since I’ve moved into my new apartment last year, I’ve actually managed to keep three orchids alive and blooming (occasionally). However, even my passion flower gave up on me last winter after I managed to keep it alive (if not very happy) for two years. The only way my window sill looks like this is right after I’ve bought the plants and they haven’t had time to panic yet:
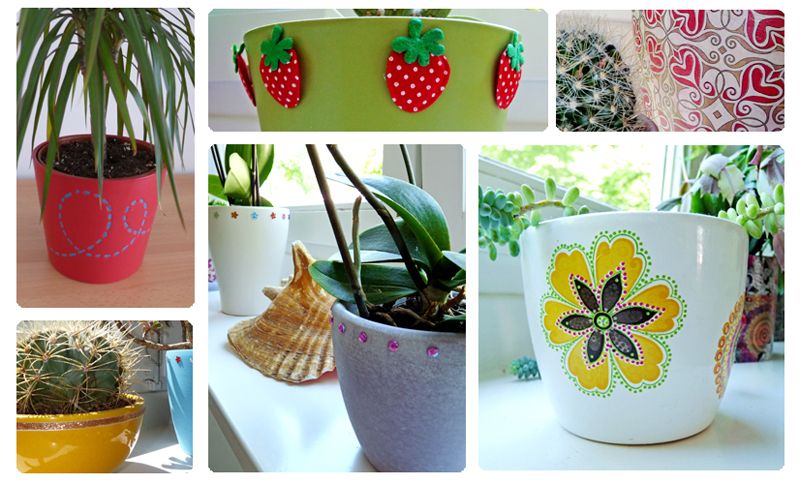
What I’m quite adept at keeping (mostly) alive are cacti and succulents, though. So I started buying these a few years back and it usually takes me quite some time to kill them. The only problem I have with them (besides the fact that they never bloom) is this: my whole window sill is a sea of green. No other color anywhere. And that can look a bit boring. So I’ve decided to do something about it. Since I can’t force my cacti to change color, I focused on my flower pots. And let me tell you: if you’ve ever looked at your pots (or at pots at shops) and thought “booooring” – there are so many easy ways to rectify that! See?
The first advantage of spicing up your pots is this: even old and ugly (or at the shop: cheap and ugly) pots can get a whole new life. I’ve started mostly buying really cheap pots on sale or even using big yoghurt cups and just changing them however I liked. I have bedazzled the life out of them, colored them with leftover paint I had standing around, decorated them with washi tape (that one’s only good for pots who go straight down and don’t narrow towards the bottom, though), and put bows on them. I always cut out the hangers when I buy new clothes and I often use those ribbons to improve my pots. I’ve also had a phase where I deco-patched everything in my way, so a lot of my pots are either completed patched, or I cut out some forms and patched them on (you’re gonna see a lot more of my decopatch-obsession in the future, so be warned). But most of the time, I actually used stuff I already had lying around the house instead of buying special deco material.
So if you want to spice up your window sill: look around your own apartment or house – so much stuff that looks like junk at first can be used to decorate your pots, you just gotta give it a try! I'd love to see what you come up with!
♥ Nicole
Well okay, that’s maybe a little bit exaggerated. Since I’ve moved into my new apartment last year, I’ve actually managed to keep three orchids alive and blooming (occasionally). However, even my passion flower gave up on me last winter after I managed to keep it alive (if not very happy) for two years. The only way my window sill looks like this is right after I’ve bought the plants and they haven’t had time to panic yet:
What I’m quite adept at keeping (mostly) alive are cacti and succulents, though. So I started buying these a few years back and it usually takes me quite some time to kill them. The only problem I have with them (besides the fact that they never bloom) is this: my whole window sill is a sea of green. No other color anywhere. And that can look a bit boring. So I’ve decided to do something about it. Since I can’t force my cacti to change color, I focused on my flower pots. And let me tell you: if you’ve ever looked at your pots (or at pots at shops) and thought “booooring” – there are so many easy ways to rectify that! See?
The first advantage of spicing up your pots is this: even old and ugly (or at the shop: cheap and ugly) pots can get a whole new life. I’ve started mostly buying really cheap pots on sale or even using big yoghurt cups and just changing them however I liked. I have bedazzled the life out of them, colored them with leftover paint I had standing around, decorated them with washi tape (that one’s only good for pots who go straight down and don’t narrow towards the bottom, though), and put bows on them. I always cut out the hangers when I buy new clothes and I often use those ribbons to improve my pots. I’ve also had a phase where I deco-patched everything in my way, so a lot of my pots are either completed patched, or I cut out some forms and patched them on (you’re gonna see a lot more of my decopatch-obsession in the future, so be warned). But most of the time, I actually used stuff I already had lying around the house instead of buying special deco material.
So if you want to spice up your window sill: look around your own apartment or house – so much stuff that looks like junk at first can be used to decorate your pots, you just gotta give it a try! I'd love to see what you come up with!
♥ Nicole
2013/06/29
Zwiebackpudding / Rusk Pudding with Cherry Compote
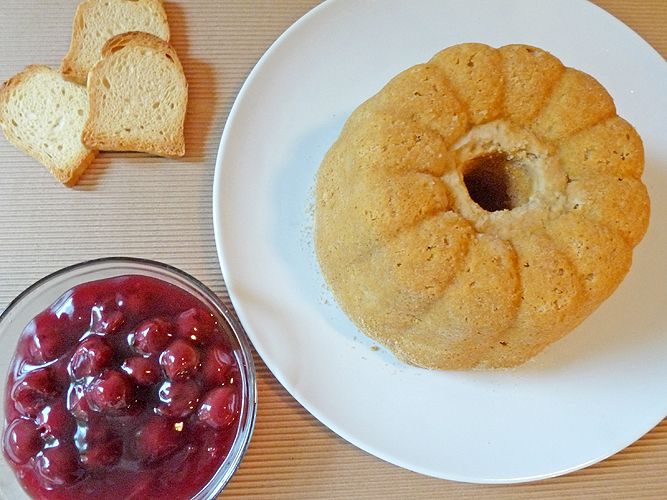
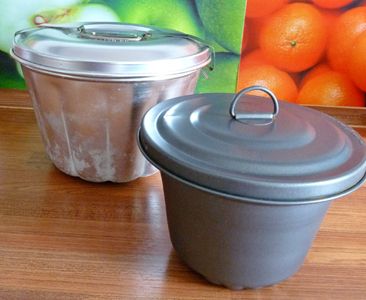
Ever heard of "Zwiebackpudding" (rusk pudding)? No? Then you'll fit right in with...well, everybody I know. Apparently, it's a recipe from northern Germany, but since I've been living in northern Germany for a quite a while now, I think I would have stumbled upon this somewhere, but I have never eaten or even seen it anywhere else. At least not in this version.Zwiebackpudding is something that my mom used to make since I was very little. It was always a special treat, because she only made it a couple of times a year. So when I moved out, I talked her into bequeathing her mold to me, because I knew I was gonna make it more often than just once or twice a year. You will need one of these if you want to make this. You could theoretically do it in the microwave as well, but it gets pretty dry in there.
My mold has recently gotten a little brother as you can see, since the big one is usually way too big for just myself, though I really do like to make this when I have visitors. And let me tell you, so far, they've all wanted to eat it again (or at least they weren't complaining). And yes, the big one could use a vinegar bath, I know.
Zwieback is something very typically German, so I'm not sure if you can get it abroad. I've never seen it abroad, but then again: I've never looked, so you might be able to get it in some specialty stores or order it online. Or in every grocery store, who knows? The most common brand in Germany is Brandt. Basically, it's a twice-baked bread that is slightly sweet.
Anyway. This Zwiebackpudding takes a bit or preparation and an hour of cooking time at least, but it's totally worth the wait. It's sweet, so a lot of people ask me why I don't eat it as a dessert, but as a main entree. Well, because it's really, really rich. And filling. I wouldn't wanna eat it after already having eaten a regular meal. So you should keep that in mind when you decide whether to serve it as an entree or a desert.
Zwiebackpudding
For the pudding:
10-12 pieces of Zwieback
125 ml milk
125 ml whipped cream
4 eggs
80g sugar
1/2 tsp cinnamon (or more. Just go for it. I usually put like, a tablespoon in there and the flavor is still pretty subtle)
1 tsp baking powder
For the cherry compote:
250g sour cherries (canned)
1 tbsp cornstarch
For the mold:
some butter
2 tbsp of breadcrumbs
1. Grease your mold (including the lid) and sprinkle generously with breadcrumbs.
2. In a big bowl, crumble your Zwieback into smallish pieces (about an inch in size). If they aren't all exactly the same size - don't worry about it.
3. Mix the milk and cream and heat up, but don't let it boil. Pour the hot mixture over the crumbled Zwieback. Let it soak for about 15 minutes.
4. Divide your eggs and whip the egg yolks with the sugar, cinnamon and baking powder until the mixture is a light yellow and has significantly increased in volume (about a couple of minutes).
5. Mix the egg yolk mixture under the Zwieback. Don't be too careful with it, it's not egg whites. Just smush it all together until you have a fairly homogenous mix.
6. Beat the egg whites until they're very stiff and fold under the Zwieback-mixture.
7. Fill the mix into the form (make sure your mold is only filled 2/3 of the way), put the lid on and cook in a pot of water on medium heat for about an hour.
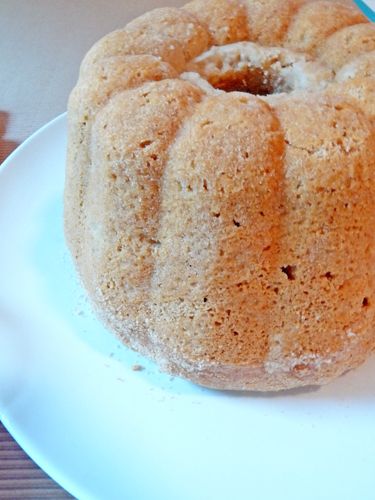
8. Take the mold out of the pot and let it stand for about 5 minutes before removing the lid. If the pudding is stuck in the mold when you turn it over onto a plate, try putting a cold, wet towel around the mold or just give it a few good whacks.
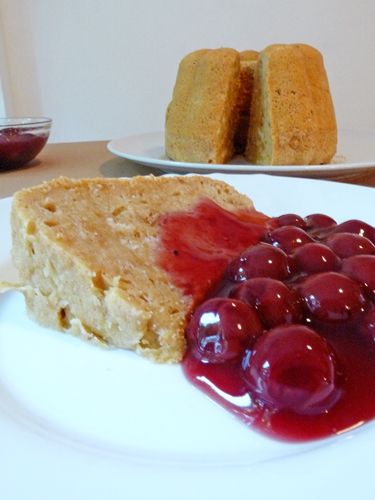
9. While your pudding is cooling in the mold, divide the cherries from their juice. Put the juice in a pot, add the cornstarch and whisk continuously until the juice starts boiling. Add the cherries and let them warm in the juice for a minute before taking the pot off the stove.
Unfortunately, there is no real way to see when the pudding is really done, but with an hour, you're usually on the safe side. The recipe is for a mold about 19 to 20cm in diameter, but you can easily adjust the recipe to fit every size. When I use my big mold (which is 21cm in diameter), I usually make 1 1/2 times this recipe and the pudding turns out beautifully in about 70 to 75 minutes, when I use my small mold (16cm), it's done in about 35 to 45 minutes. Leaving it in a couple of minutes extra won't hurt it, so if you're unsure, just add 10 minutes to be on the safe side.
By the way, I apologize for the even-crappier-than-usual pictures, but I forgot to set everything up before the pudding was done and I really wanted to eat while it was still warm, so I just tried to snap some shots in my dark kitchen real quick.
However, if you do have leftovers - the pudding also tastes great cold. The cherries, too. So don't try to warm it up again, just eat it as it is. You don't even have to put it in the fridge if you just want to eat it the next day.
Enjoy!
♥ Nicole
2013/06/22
Pencil Skirt
You all remember the half-finished skirt I showed you guys a couple of weeks ago? Well, it's finished.
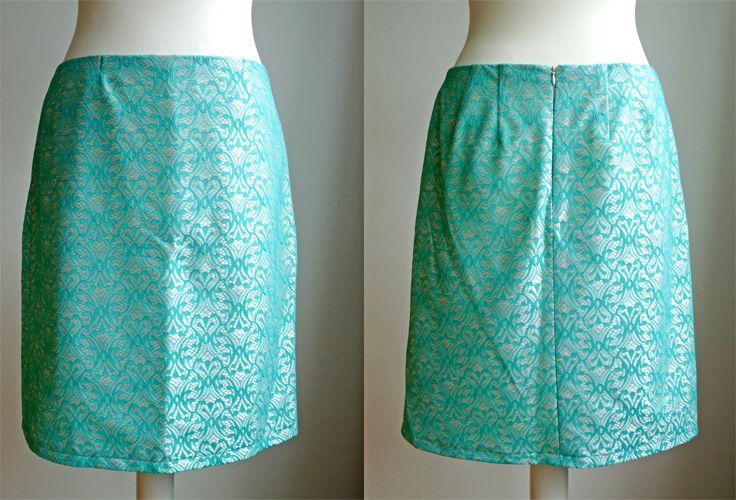
Actually, it's been finished for a while, I just haven't gotten around to posting it yet. I was pretty worried about it for a while. As I said in that last post, I got stuck somewhere in the middle and had no idea how to continue. Since I didn't want to ruin the fabric (which I adore so much and totally regret not having bought more of), I took it to a sewing course I took a couple of weeks back, hoping that a professional could help me rescue it.
Well, it was rescued. But not before a few more hours of worrying. I used So Sew Easy's instructions on how to draft a pencil skirt exactly to fit your own measurements and I had adjusted the pattern so the skirt would be waist-high. However, somewhere in between I decided I wanted it to sit a little lower. What I would have done (considering the back wasn't sewn shut yet) was to adjust the back a bit. What the professional did was cut off the top of the skirt (which is why the darts in the front are only like, an inch long and look a little weird). O_o First real moment of panic right there. Especially since the skirt was way too loose around my waist then and I had to readjust the sides completely.
But alas, it all turned out alright in the end. I did my first hidden zipper (...and totally caught my finger in the needle while doing it. Bled like crazy. Hurt for a week.), which isn't completely hidden to be honest, but I'm pretty satisfied with it.
I still think it's missing something on top, maybe a contrasting waistband of some sort. I'm thinking gathered satin or something, but I don't have the right fabric here right now, it's gonna have to wait.
As I said in my other post, I made a lot of mistakes with this one. But I'm really glad it turned out wearable in the end. Seriously, I would have cried if I would have ruined that pretty, pretty fabric.
I also made another flower out of some of the scrap fabric (well, actually I made two) to wear with the skirt. Not getting tired of those!
So, what do you guys think?
♥ Nicole
Actually, it's been finished for a while, I just haven't gotten around to posting it yet. I was pretty worried about it for a while. As I said in that last post, I got stuck somewhere in the middle and had no idea how to continue. Since I didn't want to ruin the fabric (which I adore so much and totally regret not having bought more of), I took it to a sewing course I took a couple of weeks back, hoping that a professional could help me rescue it.
Well, it was rescued. But not before a few more hours of worrying. I used So Sew Easy's instructions on how to draft a pencil skirt exactly to fit your own measurements and I had adjusted the pattern so the skirt would be waist-high. However, somewhere in between I decided I wanted it to sit a little lower. What I would have done (considering the back wasn't sewn shut yet) was to adjust the back a bit. What the professional did was cut off the top of the skirt (which is why the darts in the front are only like, an inch long and look a little weird). O_o First real moment of panic right there. Especially since the skirt was way too loose around my waist then and I had to readjust the sides completely.
But alas, it all turned out alright in the end. I did my first hidden zipper (...and totally caught my finger in the needle while doing it. Bled like crazy. Hurt for a week.), which isn't completely hidden to be honest, but I'm pretty satisfied with it.
I still think it's missing something on top, maybe a contrasting waistband of some sort. I'm thinking gathered satin or something, but I don't have the right fabric here right now, it's gonna have to wait.
As I said in my other post, I made a lot of mistakes with this one. But I'm really glad it turned out wearable in the end. Seriously, I would have cried if I would have ruined that pretty, pretty fabric.
I also made another flower out of some of the scrap fabric (well, actually I made two) to wear with the skirt. Not getting tired of those!
So, what do you guys think?
♥ Nicole
2013/06/21
Strawberry Cardinal
I haven't really gotten around to baking something in the past few weeks, because I've been somewhat preoccupied with sewing. Well, and there wasn't really anyone who could've eaten it with me. And I'm on somewhat of a half-assed diet again (and really, when am I not?).
So today I visited my former work place, so I used the chance of knowing there were plenty of people who I could share with (and who usually were very keen on eating my cakes) and finally made something again. I realize it may not look like much, but don't judge a book by its cover (Heh. A publishing pun.)...or in this case, a cake by its outside - it's aaaaall on the inside.
The base and top each are a layer of sponge and a layer of meringue. The bottom layer is soaked in lemon curd and topped with vanilla whipped cream and strawberries. Sound better now?
I have no idea idea why this is called a strawberry cardinal, by the way. Just go with it.
Strawberry Cardinal
For the sponge:
2 eggs plus 4 egg yolks
80g flour
1/2 tsp of baking powder
70g of powdered sugar
For the meringue:
4 egg whites
100g sugar
For the filling
2 tps lemon curd
300-400g of strawberries (well, basically as many as you want to be in there)
250ml vanilla whipped cream (alternatively: whipped cream plus 2 pkg. of vanilla sugar or 1/2 tsp of vanilla extract)
1. Whisk the eggs, egg yolks and the powdered sugar with an electric mixer until they have tripled.
2. Sift the flour and powdered sugar on top and carefully fold in until it's just incorporated.
3. Divide the dough between two 28 or 30cm greased springform pans.
4. Mix the egg whites for a minute, then slowly add the sugar and continue whisking until a fairly firm meringue has formed (it doesn't have to be super stiff, though, or you won't be able to spread it on the dough).
5. Divide the meringue between the two pans, and spread it over the dough.
6. Bake on 150°C for about 20 to 30 minutes.
7. Whip the vanilla whipped cream, cut up the strawberries into small pieces and mix the two.
8. When the cakes are completely cooled, spread a thin layer of lemon curd on the bottom layer, spread the whipped cream on it and put the second cake layer on top.
9. Sprinkle with powdered sugar right before serving. (Or decorate with whipped cream and more strawberries. Basically, be a lot more creative than I was!)
Bon appetit!
♥ Nicole
2013/06/15
Mathilde Blouse
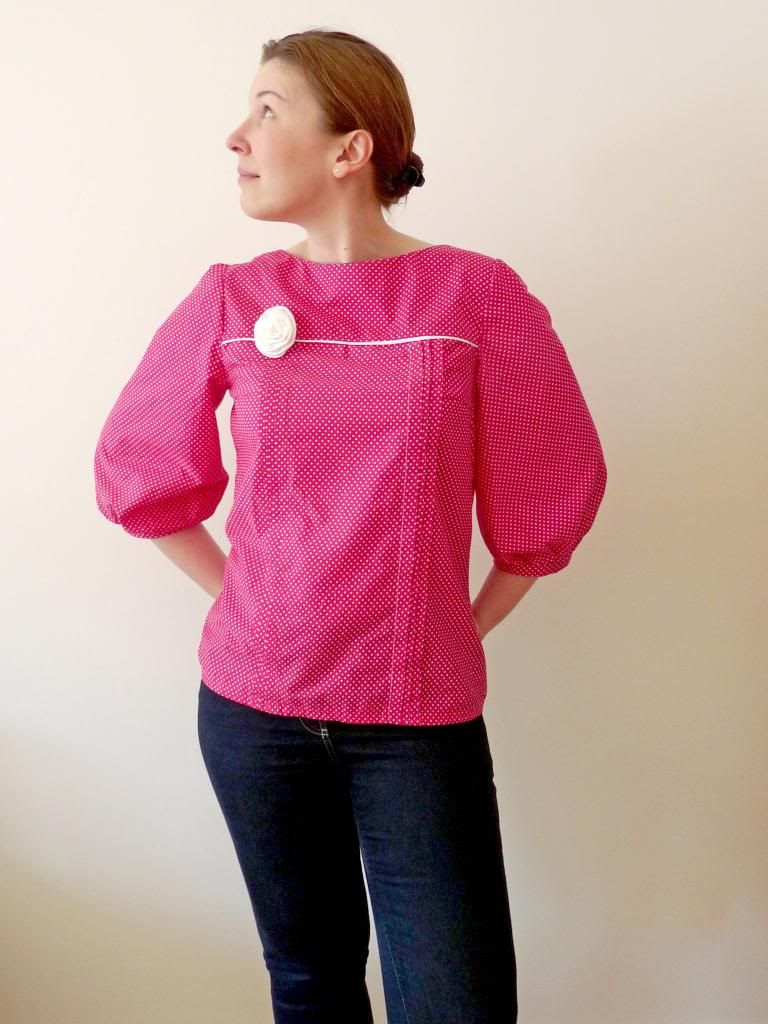
For my birthday in February, a friend gave a book of sewing techniques with a card that said "For when we're sewing the Mathilde blouse." O_o Just to give you a frame of reference: back then, I could barely sew straight lines, so there was a lot of hysterical giggling involved when I checked out what my challenge was going to be.
To be honest, I didn't think I could ever produce anything remotely wearable, but alas, I prevailed (which is my usual attitude when it comes to sewing: prevail.).
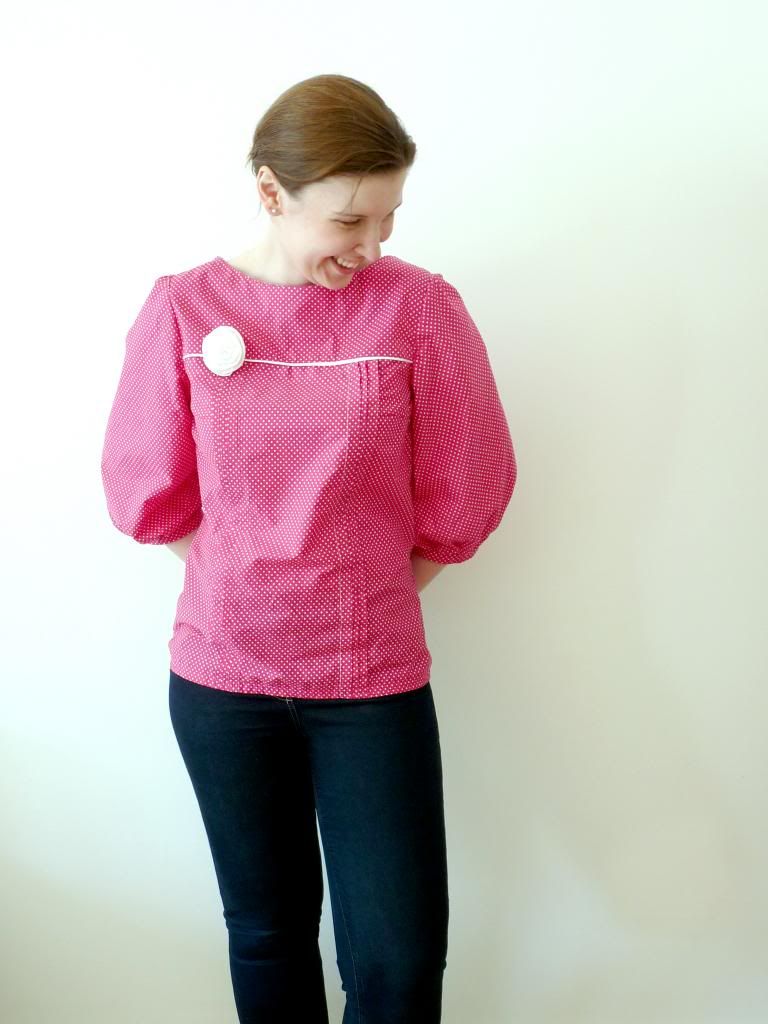
However, there's a laundry list of things that went wrong with it. The buttons aren't completely centered, the tucks are anything but straight and my first encounter with piping didn't exactly go as planned. Plus: the pen I used to mark the fabric didn't disappear when I washed it, but actually just bled through everything and now can be seen in various places if you look closely.
Also, if I did it again, I'd do a few things differently. Even though the blouse is supposed to be a loose fit, it was a little too loose for me. I had to take it in at the waist a little, so it had some shape, but it still could be a size smaller. The sleeves also turned out extremely poofy (totally my own fault), so these I'd make a lot less poofy, too.
Still, I'm kinda proud of it and it's actually the first piece of clothing I've made that I've worn in public. And as you can see: another flower embellishment. I just love these lately. They're such an easy addition to everything and can completely change the look of something.
If you wanna give a it a go yourself, you can find the pattern over at Tilly and the Buttons!
Abonnieren
Posts (Atom)