Aaaaah, summer. Just when I was almost convinced that I wouldn’t be seeing any of you this year, you decided to make an appearance. Finally. And of course, right when it starts getting warm outside, I decide to start baking again. Go figure. Especially since I’m not exactly known for my pound cakes and pies, but rather for my…let’s say “cream-heavy” creations. But: even a creamy gateaux can be adjusted to be fresh and less heavy for a warm summer day (…and less likely to turn sour from one minute to the next) by substituting only a few ingredients.
This cake is as versatile as they come and you can pretty much adjust the filling ingredients however you want (or depending on whatever you can get wherever you live). I used a recipe for the sponge, but for the lemon and berry cream, I just threw some things together into a bowl. You can use quark, cream cheese, natural yoghurt, mascarpone, sour cream, or whatever floats your boat and just flavor it to taste. I tried to make mine a little lighter and less sweet than a “regular” cake and I thought it tasted fresh and fruity without being overpowering on a warm day.
Also, I’ve made the experience that many of the internet recipes I use are about 80% sugar (at least that’s what it feels like) and even though I have a higher tolerance for sugar than most people I know (Really, I do. You should see the looks I get sometimes when I go for the fourth piece of cake.), I’ve realized that most cakes work with about a third of the sugar stated in the recipe (sometimes even less). You don’t even have to substitute it with Stevia or something, just leave it out, especially in fillings (you have to be a little more careful when it comes to the cake batter). So this is what I did here (and what I usually do when I do creamy fillings): I just put sugar in a tablespoon at a time and tasted between each spoon. Then I stopped as soon as I felt it was sweet enough. So the measurements in the recipe can be seen as guidelines: they worked well for me, but feel free to adjust them to your own taste.
Lemon Berry Gateau
For the sponge:
4 eggs
140g sugar
120g flour
1 tsp baking powder
For the filling:
750g Quark (Magerquark, 10% fat)
300ml whipping cream (I used Cremefine, which is a whipping cream substitute with less fat)
5 tbsp powdered sugar
1 tbsp vanilla essence
2 tbsp lemon juice
4 tbsp lemon curd
7 heaped tbsp gelatin powder (we need gelatin that dissolves in COLD liquids)
300g mixed frozen berries (my mix had raspberry, blackberry, blueberry, and red currant)
As I said, you can substitute pretty much everything in this cake. Don’t have quark where you live? How about a low-fat cream cheese? You prefer the taste of real whipping cream? Go for it! 4 tbsps of lemon curd isn’t lemony enough for you? Put in a whole glass if you like!
Sponge
1. Beat the eggs and the sugar until the mixture has tripled in volume.
2. Sift the flour and baking powder and fold slowly into the egg mixture.
3. Line two spring pans (mine were 28cm I think) with baking paper and evenly divide the batter between the two pans.
4. Bake at 190°C for about 10 minutes or until golden brown on top. Let the cakes cool completely before filling them.
Filling
1. Unfreeze your frozen berries in a bowl at room temperature. If they’re still a bit frozen when you want to use them, don’t worry.
2. Put the berries into a pot and slowly warm them up. Stir frequently to make sure they don’t start sticking to the bottom of the pot. Let them simmer for a few minutes until they’re really soft and heated.
3. Puree the fruit (I used a hand blender) and put it through a fine strainer (because we only want the pulp, not the skins). Put aside.
4. Put the quark in a bowl and add the vanilla essence, lemon juice and powdered sugar. Mix well.
5. Whip the whipping cream (or, in my case: the low-fat-whipping-cream-substitute) and fold into the quark mix.
6. Divide the quark mix in half. Mix the lemon curd into one half of the mix, then add about 3 heaped tablespoons of gelatin and mix well.
7. Fold the cooled berry puree into the other half of the quark. Add about 4 heaped tablespoons of gelatin and mix well.
Assembly
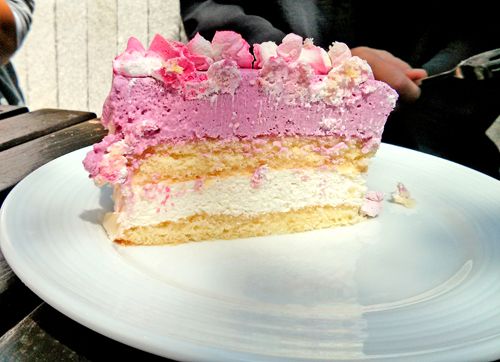
1. Fit one layer of the sponge into a cake ring. Pour the lemon quark on top and smooth out. Put the second layer of sponge cake on top and press down slightly until everything is nice and even. Pour the fruity quark on top and smooth out as well.
2. Put into the fridge for at least a couple of hours until everything has had a chance to set before you start decorating the outside.
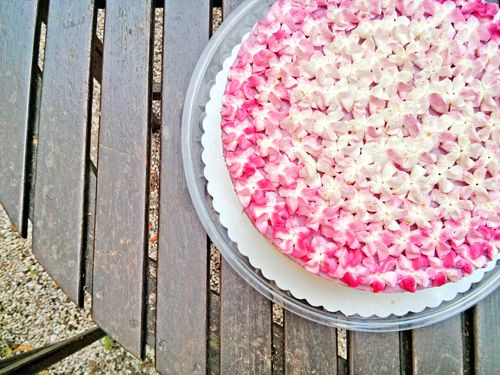
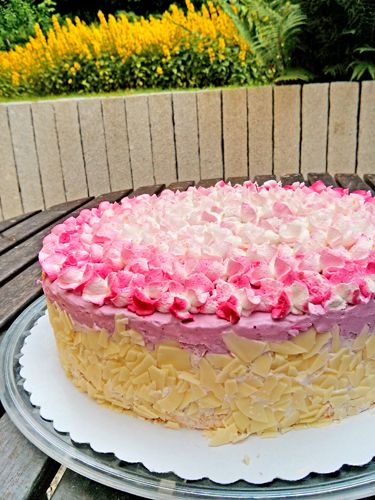
3. Decorate the outside however you like. I used about 100ml of whipping cream (substitute) and piped some two-tone flowers on top and then used to rest to lightly crumb-coat the sides so my white chocolate flakes would stick.
4. Put back into the fridge until you’re ready to eat! (Overnight would be best, so the flavors have some time to really develop, but you can eat it after a couple of hours if you don't want to wait.)
While making this cake, I also realized I have a new problem: since 98% of the cakes I make are for other people’s birthdays, I’m really getting into photography trouble here. The cake was done sometime around 10 at night, so it was too dark to take pictures. The next morning I got up half an hour early to quickly take some pictures before work, but the light was so horrible that the pictures turned out all blurry and dark and I didn’t have a lot of time before I had to get going, so I had to take a few quick snaps with my cellphone right before it was eaten. And this is going to be pretty par for the course for the foreseeable future I’m afraid. (Had the same problem again this morning with another cake.) Anyway, I’ll try my best to give you some halfway decent pictures at least.
Enjoy!
♥ Nicole
2013/07/15
2013/07/08
The Bow Clutch (or: lessons in thinking before acting)
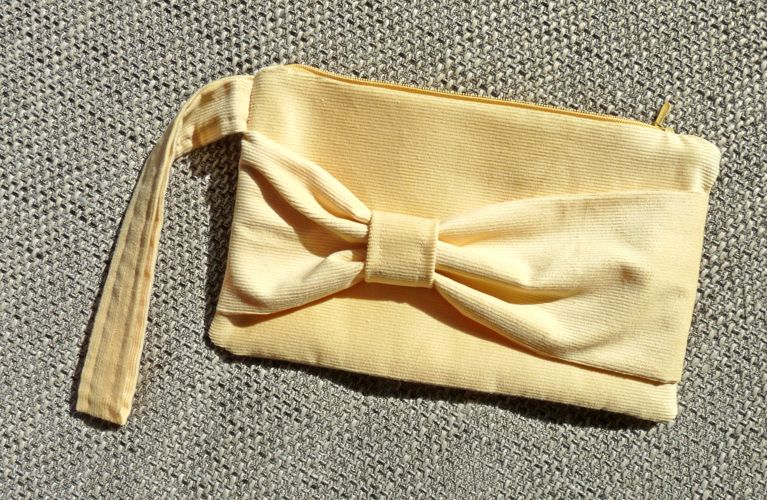
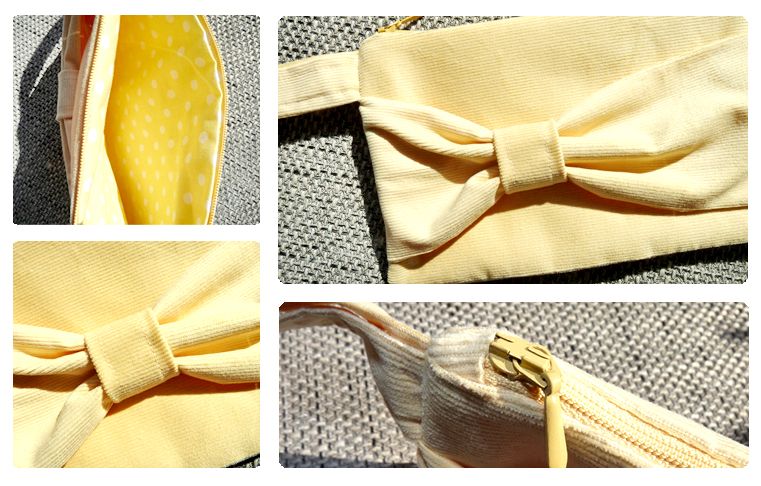
Seeing as I have imposed a clothes-sewing-embargo on myself until I have lost at least 10 pounds (...so basically, until 2036 or thereabouts), but I really felt like sewing over the weekend (don't you hate summer break when there's nothing on tv all week that you can catch up on on the weekend? And you can only read so much until you don't feel like reading anymore), I had to improvise. Good thing I saw this beautiful clutch with a bow somewhere online last week that I immediately fell in love with. Unfortunately, as I was...well, let's say "not at home" when I found it online, I couldn't really bookmark it and complete forgot where I saw it. But I knew what it had looked like, so I thought I'd give it a go without the step-by-step instructions anyway.
The thought alone should have stopped me in my tracks. I know how things turn out whenever I start thinking "Eh, I'll just wing it." I mean, the clutch looks easy enough, but I had never sewn anything with a lining, much less a lining and a zipper before this weekend. The smart thing to do probably would have been to check out a tutorial how to do that before I got started. In my defense, I did flip through my sewing books, didn't find anything on it and, again, thought: "Eh, I'll just wing it."
Needless to say, attempt number 1 didn't quite turn out how it was supposed to. Instead of cutting four pieces (two for the lining, two for the outer layer), I tried working with two ('cause really, who needs a seam at the bottom? Just one more step and it doesn't make the whole thing prettier!). Which everybody who has ever inserted a lining will tell you: won't work. Unfortunately, I only realized how much trouble I was really in when I came to the point where attaching the last part to the zipper was physically impossible, no matter how often I turned the thing. That was the point when I finally bothered to check out a video tutorial online. Well, better late than never. One epiphany later, I started over and this time, I got it right.
Well, as much as I can get stuff right. It turned out pretty well for me, though. I'm not 100% happy with the zipper (it kinda sticks up at one end), but everything else I'm mostly satisfied with, so: go me!
The original clutch I saw was made out of linen, but I hate linen (Seriously, it's my anti-fabric. I have never owned anything made out of linen and I swear I never will.), so I got some light yellow needlecord for it, which I adore. Unfortunately, it seems to be a lot more delicate than I thought it would be. It had some folds from the store and I swear it was impossible to iron them out completely. Plus, after turning the fabric around a couple of times, it looked pretty awful. Not to mention that you constantly have to de-lint it. But it looks pretty, so there's that.
If you want to give it a go yourself: easiest pattern ever. If anyone's interested I can write down some quick instructions (since I can't find the original anymore to link to - I'll give it another look, though!). Just let me know in the comments!
EDIT: Hah! Found it! Here are the original instructions!
2013/07/04
Decorated Flower Pots
If there’s one thing I don’t have, it’s a green thumb. Flowers wilt in my presence. Leaves shrivel up and die. It’s quite disconcerting actually. I’ve stopped counting how many gerber daisies (my favorite flowers) I have killed inside of two weeks of buying them. At least a dozen orchids have stopped blooming immediately after coming into my care. I have the thumb of death when it comes to things that have the ability to sprout any type of blossom.
Well okay, that’s maybe a little bit exaggerated. Since I’ve moved into my new apartment last year, I’ve actually managed to keep three orchids alive and blooming (occasionally). However, even my passion flower gave up on me last winter after I managed to keep it alive (if not very happy) for two years. The only way my window sill looks like this is right after I’ve bought the plants and they haven’t had time to panic yet:
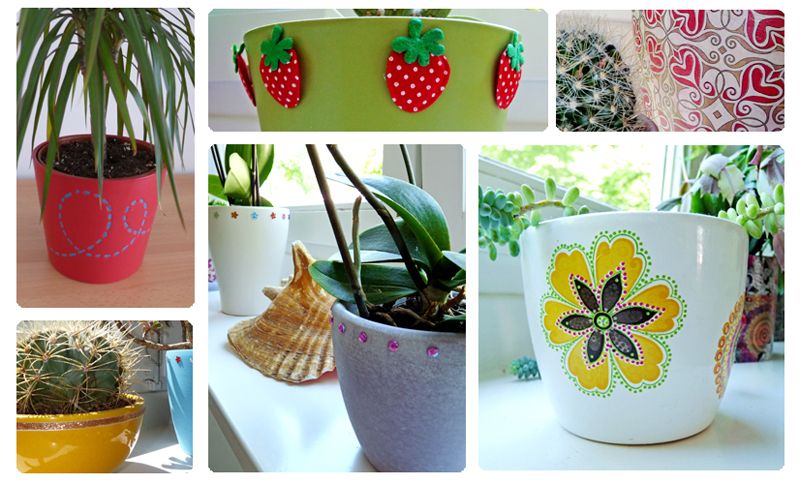
What I’m quite adept at keeping (mostly) alive are cacti and succulents, though. So I started buying these a few years back and it usually takes me quite some time to kill them. The only problem I have with them (besides the fact that they never bloom) is this: my whole window sill is a sea of green. No other color anywhere. And that can look a bit boring. So I’ve decided to do something about it. Since I can’t force my cacti to change color, I focused on my flower pots. And let me tell you: if you’ve ever looked at your pots (or at pots at shops) and thought “booooring” – there are so many easy ways to rectify that! See?
The first advantage of spicing up your pots is this: even old and ugly (or at the shop: cheap and ugly) pots can get a whole new life. I’ve started mostly buying really cheap pots on sale or even using big yoghurt cups and just changing them however I liked. I have bedazzled the life out of them, colored them with leftover paint I had standing around, decorated them with washi tape (that one’s only good for pots who go straight down and don’t narrow towards the bottom, though), and put bows on them. I always cut out the hangers when I buy new clothes and I often use those ribbons to improve my pots. I’ve also had a phase where I deco-patched everything in my way, so a lot of my pots are either completed patched, or I cut out some forms and patched them on (you’re gonna see a lot more of my decopatch-obsession in the future, so be warned). But most of the time, I actually used stuff I already had lying around the house instead of buying special deco material.
So if you want to spice up your window sill: look around your own apartment or house – so much stuff that looks like junk at first can be used to decorate your pots, you just gotta give it a try! I'd love to see what you come up with!
♥ Nicole
Abonnieren
Kommentare (Atom)

