2013/12/23

The 12 days of Christmas...y food: Day 12 - Gingerbread Tiramisu


Hallelujah. I made it to day 12 before Christmas Eve. Never thought that would happen. Heh. Looks like I should set myself goals more often.

A couple of years ago I did some advanced job training and at the facility where they held our seminars, they served us gingerbread tiramisu for dessert one day. And the first thing I thought was "Why haven't I thought of that before?" And really, why hadn't I? Anyway. The tiramisu they served there tasted okay, but I thought I could improve on it a little. Namely, by adding copious amounts of alcohol. And other stuff. Plus, I like my tiramisu a little lighter, so I don't use eggs and I don't like to just use mascarpone, so I usually mix it with quark. If you can't get quark where you live - don't worry, it tastes fine with just mascarpone and cream as well. Just substitute the quark for mascarpone and cream (1:1).

This is going to be my Christmas dessert, by the way (On all three days. Because as usual, I made way, way too much for one person to eat.) So looking back at what I used for the recipe I'd say you're looking at either three very, very big desserts (that I'm gonna have problems finishing after a roast) or six desserts that'll be slightly easier to finish.


Gingerbread Tiramisu

Ingredients:
about 10 pieces of gingerbread (and by gingerbread, I actually mean German "Lebkuchen", the normal chocolate covered kind without wafers)
1 cup of freshly brewed, but slightly cooled down coffee
200g mascarpone
200g quark
100g whipped cream
50g sugar
2 p. vanilla sugar (or 1/2 tsp vanilla extract)

Optional:
about 100-150ml Bailey's (I used the hazelnut flavored Bailey's)
about 50ml hazelnut syrup
cocoa powder or chocolate shavings for decoration


1. Whip the cream with one package of vanilla sugar. (If you use vanilla extract, don't add it to the cream.)

2. Put the mascarpone, quark, sugar, 1 package of vanilla sugar (or alternatively, the vanilla extract), about 100ml of Bailey's and a couple of tablespoons of the hazelnut syrup in a bowl and whip with an electric mixer until well combined (the Bailey's and hazelnut syrup is really to taste - you like it stronger, put in more, you like your flavor very subtle - put in a little less).

3. Fold in the whipped cream.

4. Cut the Lebkuchen into smallish pieces (mine were about 3 to 4cm).

5. Mix the coffee with Bailey's and hazelnut syrup to taste.

6. Start layering the different components into glasses or dessert bowls, starting with a layer of Lebkuchen. Sprinkle a few tablespoons of coffee over the Lebkuchen - just enough to soak it. Add a layer of mascarpone cream. Start over. Depending on the size of your glasses and how thick you make each layer, you should get about two to three layers of each into a glass.

7. Top with cocoa powder or chocolate shavings.


Enjoy and happy holidays!
♥ Nicole

2013/12/21

The 12 days of Christmas...y Food: Day 11 - Biscoff Bark


Okay, I've run out of cookies. Bad planning on my part I guess. I thought about just using some cookies I made last year to fill the last two days, but then again - there's more Christmas-y food where the cookies came from, so I decided just to give you that.

This Biscoff Bark is something I've been making for the past three years or so, so I guess it's becoming a bit of a tradition. I've changed the composition around a few times everytime I made it, so I have a favorite combination (milk and white chocolate), but if you want something to set off the sweetness of the white chocolate, you could always use dark chocolate or a mix of dark and milk chocolate instead. I, personally, hate dark chocolate, though (Chocolate has to be sweet. Period.), so I'm gonna stay with the milk chocolate from now on.

I love the biscoff flavor in the chocolate (adding the biscoff also makes for a softer chocolate that basically melts in your mouth, but what gives this bark its finish are the freshly roasted hazelnuts. It's amazing! And if you're willing to share, it makes for a quick last minute gift.


Biscoff Bark

200g milk chocolate
100g white chocolate
50g cookie butter / biscoff spread
100g whole hazelnuts
Speculoos Hagelslag (if you can find some)


1. Put the whole hazelnuts on a baking tray and put them in the oven at 180°C for about 10 minutes. (You'll realize they're roasted when the skin starts coming off).

2. Wrap the hazelnuts in a towel and rub them together so their skin peels off. (I took mine out of the oven a little too soon this time, so that's why mine still have their skin on the pictures. If you have the same problem, put them back in for a couple of minutes, but make sure you don't burn them!)

3. Use a big knife to chop them up a little (halves are fine). Set aside.

4. Melt both the milk chocolate and the white chocolate in separate bain-maries.

5. Once the white chocolate is melted, add the cookie butter and whisk (with a spoon) until the cookie butter has melted into the chocolate and you get an even consistency.

6. Line a baking tray with baking paper and pour the milk chocolate on top. Spread it a bit either by tilting the tray or using a spatula. Mine is usually about half a centimetre in thickness and gets a little thinner around the edges.

7. Using a spoon, drop dollops of the white biscoff chocolate onto the milk chocolate and swirl with a fork.

8. Immediately add the hazelnuts and, if you can get some where you live, the speculoos hagelslag.

9. Put into the fridge for about an hour to set.

10. Break into big chucks.


Enjoy!

♥ Nicole

2013/12/20

The 12 days of Christmas Cookies: Day 10 - Buttercream Blondie's Spiked Mint Milanos


Today, I'm gonna cheat a little. I hadn't planned on baking any more cookies after I was done with the first batch, but I saw these last week on Buttercream Blondie's blog and I just had to try them. However, since she only posted them last week, I don't really want to take her recipe and repost it here, so instead I'm just going to send you over to her blog. Her cookies look a lot more appetizing than mine anyway.


I made a couple of alterations to the recipe, though, because for me, the amount of flour in the recipe didn't work. That could be due to the fact that I was a little more generous with the baileys than the recipe stated, though. I had to add at least 100g more to make the dough workable.

I didn't have any mint-flavored baileys at home either, so I used the regular kind and just added a few drops of peppermint aroma, which works fine. You can still taste both the baileys and the mint when you eat the cookies.

I also spiked the ganache with baileys (because you can never have enough baileys in your cookie once you find out you actually can have baileys in your cookie), which also worked fine. So if you like baileys: go for it.

Personally, I have no idea, though, how she got all her trees to look the same. Mine all came from the same cookie cutter, too, but they differ more than a little in size and shape (which made it a bit of a challenge to always find 2 that went mostly together).

And: storing them in the fridge is kind of mandatory if you want the ganache to last for more than a couple of days, but take them out a while before you wanna eat them. I think they taste a lot better and are a lot more flavorful at room temperature than directly out of the fridge.


So, go over there and try them out. You know you want to!

Enjoy!
♥ Nicole

2013/12/19

The 12 days of Christmas Cookies: Day 9 - After Eight Cookies


Geez, I really need to hurry up this week if I want to get this done before Christmas Eve, don't I? Sorry, but Office Christmas Parties, baking Christmas gift and stuff kind of got in the way. But I'll get it done, I promise. However, as I feared in the beginning: I'm short two types of cookies. But do not fear, I have other Christmasy food to show you on the last two days.

Today's cookies I've made for the past three years or so, usually due to popular request by others. Myself, I always find them a little underwhelming to be honest. Others seem to love them, though. In the three years I've made them, I've also never managed to make them look appealing. The first year, the chocolate kind of fell off. Last year, it was too thick and I had the worst trouble piping it. This year, I went for dipping the cookies in chocolate, but the food coloring really messed the chocolate up. Maybe that's why I don't like them as much, because it's not like they taste bad or anything. So if you're a master decorator (or even a mediocre decorator - you just need to be better at it than I am), you might be able to save them.


After Eight Cookies (a.k.a. "Chocolate Mint Cookies")


For the cookies:

80g After Eight (or any other mint-filled chocolate)
125g softened butter
50g powdered sugar
a pinch of salt
1 egg
250g all-purpose flour
1 tsp baking powder
2 tbsp dutch cocoa

For the decoration:
100g white chocolate


1. Chop up the After Eight into small pieces.

2. Mix the flour, baking powder and cocoa. Set aside.

3. Using a handheld mixer, cream the After Eight with the butter, powdered sugar and salt.

4. Add the egg and beat until the mix is nice and fluffy.

5. Slowly add the flour and continue working the dough until it's fairly homogenous.

6. Take it out of the bowl, cover it in clingwrap and refrigerate for at least 2 hours.

7. Preheat your oven to 160°C.

9. Roll out the dough to about half a centimetre thickness and cut out whatever shapes you like. (A word of caution, though: either you need to refrigerate the cut-out cookies for half an hour before baking or you should choose fairly simple shapes, since the dough tends to not keeps its form that well.)

10. Bake for about 12 minutes.

11. Melt the white chocolate in a bain-marie and either dip the cookies in it or pipe some swirls on top of the cookies.


Enjoy!
♥ Nicole

2013/12/15

The 12 days of Christmas Cookies: Day 8 - Sour Cream Cookies


How is it Sunday already? Didn't the weekend just start?!? Well, at least there's only 5 working days left until my Christmas vacation starts. Hallelujah. And for quite possibly the first time this year, I actually have about 8 days of absolutely nothing to do but lying on my couch ahead of me. No interviews to do (well, until my second week off that is) and I'm definitely not taking home any work from job 1&2 (though I probably should considering that I'm not getting around to doing anything at work lately aside from sitting in meetings). My Christmas wish this year? For my (former) bosses to finally find a replacement for me so I can start concentrating on my new job. Cause right now I kinda feel like I'm not doing either of them justice. And that's exhausting. And frustrating. And sometimes, plain annoying.

So let's talk about less frustrating stuff. Cookies, for example. I made these sour cream cookies for the first time this year and I have to say right away: you probably won't be winning any beauty contests with them. But at least they taste nice. They're moist and creamy and just yummy. So there's that. Just keep them for yourself instead of giving them away and you'll be fine. I was a little concerned at first that they'd go bad after a week because of the sour cream, but they're still fine after three weeks now and I didn't refrigerate them, so don't worry about that.


Sour Cream Cookies

For the cookies:
175g softened butter
a pinch of salt
50g sugar
250g flour
200g sour cream

For the decoration:
2tbsp coarse sugar (I used "Kluntinchen", which is a tea sugar)
Sprinkles, if you want them


1. Cream the butter, sugar and salt until light yellow and fluffy.

2. Slowly add the sugar and about 5 tablespoons of the sour cream.

3. Wrap the dough in clingwrap and put into the fridge for at least 2 hours.

4. Line your baking trays with baking paper and preheat your oven to 180°C.

5. Take the dough out of the fridge and knead for a minute.

6. Roll out the dough to a thickness of about 7 to 10mm and cut out shapes (best are mostly round shapes).

7. Spread a little bit of sour cream onto every cookie (How much depends on how big your cookies are. They should be completely covered in about 3 to 5mm of sour cream.).

8. Sprinkle the coarse sugar on top (NOT any other kind of sprinkles!)

9. Bake for about 10 minutes. The cookies aren't supposed to change color.

10. If you want to add sprinkles of any kind, add them immediately after taking the cookies out of the oven and gently press them into the cookie a little so they'll stay on.


Enjoy!
♥ Nicole


2013/12/14

The 12 days of Christmas Cookies: Day 7 - Nutty Cinnamon Meringue Balls


Wow, people - I need to hurry if I want to be done before Christmas with the 12 days countdown that's slowly turning out to be a 20 day countdown. Oops. Sorry about that, but I'm still having laptop trouble that's keeping me awake at night (quite literally), plus I kinda have to fit in Christmas parties and Christmas market visits and whatnot into my evenings (today it's The Hobbit), so let's just say: I'm never short of excuses.

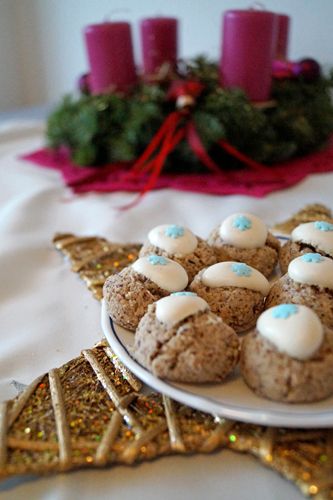
Anyway. I've been making these Nutty Cinnamon Meringue Balls for the past few years and my success rate....differs. The first couple of years these turned out beautiful. Last year: completee disaster. Inedible. This year: nice on the inside, not so nice on the outside. So these are a bit tricky, probably because there's meringue involved. So it meringues, macarons or macaroons are no problem for you: go for it. If you've got an ambivalent relationship with meringue: maaaybe give it a try. Meringue never works for you? Go find different cookies. Seriously. Go.


Nutty Cinnamon Meringue Balls

For the cookies:
3 egg whites
250g powdered sugar
1 p. vanilla sugar
1 tsp cinnamon (Or more. I usually use waaaaay more.)
300g finely ground hazelnuts

For the decoration:
I've tried a few different things here before: whole hazelnuts, almond slivers and (this year) sprinkles. So whatever you like best.


1. Start beating the egg whites (best would be to use a stand mixer). Once they start getting stiff, slowly start adding the powdered sugar and vanilla sugar and keep beating until the sugar is well incorporated and the meringue is fairly stiff (mine never gets completely stiff, so don't worry if yours doesn't either. Or maybe that's my problem and you should worry. Drop me a comment if you have a suggestion there.).

2. Put aside about 5 tbsp of the meringue.

3. Quickly fold the cinnamon and ground hazelnuts into the meringue.

4. With your hands, form small, walnut-sized balls (it helps if your hands are wet, since the mix is pretty sticky and your wet hands help form very smooth balls) and put them on a baking tray lined with baking paper. Make sure to leave some space between them, since they will rise a bit during baking.

5. Use the back-end of a wooden spoon or a chopstick and make a small dent in the middle of each ball (about 1cm deep).

6. Fill the leftover meringue (that we set aside earlier) into a piping bag and pipe a little dollop into the dent and around it. Make sure it's not too much if your meringue isn't completely stiff, because it will get runny during baking (Don't I know it.) and that's it's as centered as possible.

7. Put your choice of decoration (nuts, sprinkles etc.) on top.

8. Preheat your oven to 125°C and bake for about 25 to 30 minutes. The tricky thing (as with every meringue-based cookie it seems) is to find the point when the inside is done and before the outside starts to crack.

I didn't succeed this year - the insides were fine, but the outsides had started cracking already (as you can see on the pictures). But with me, it's usually all about the taste, so whatever. :)


Enjoy!
♥ Nicole

2013/12/11

The 12 days of Christmas Cookies: Day 6 - Angel Eyes


I know, I know, we should be on day 10 or something already, but I've been having computer trouble for the past week or so (namely: whenever I try to update this blog and open photobucket, my graphic card crashes), so I've spent the past few nights trying to install my new laptop. I guess I need to hurry up a little, though, if anybody still wants to try any of these cookies in time for Christmas (though they all work throughout the year as well, so don't you worry.)

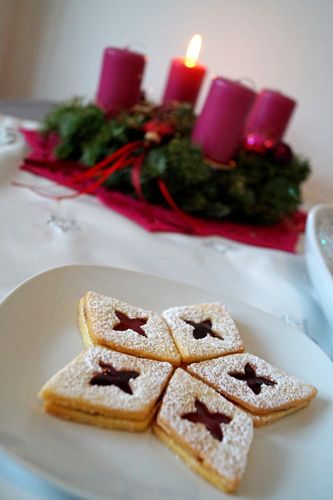
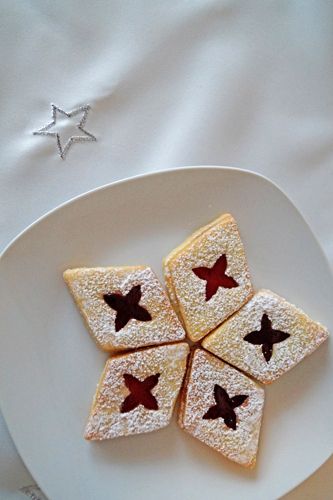
Anyway. These are one of my all time favorites. They go by about 39,827,423 different names here in Germany, but I call them Angel Eyes. These are the cookie I'm mostly likely to bake again once the first batch has been eaten and whenever I give away cookies, I'm really stingy with these, cause I'd much rather eat them myself. So this year I compromised: I filled them with two different kinds of jam - one I really like, one I don't like as much myself. Then I gave away the ones I didn't really like anyway and I didn't feel bad about having to share.

They originally go with redcurrant jelly, but you can substitute that with whatever flavor you want. I've used raspberry and apricot before (the latter being the one I myself don't like as much) - so use whatever flavor suits you best.


Angel Eyes


For the cookies:
200g all-purpose flour
1 egg yolk
60g white sugar
1 p. vanilla sugar (alternatively: 1/2 tsp. vanilla extract)
a pinch of salt
1/2 tsp lemon zest
125g softened butter

For the filling:
100g redcurrant jelly (or any flavor you like, just make sure it's not jam, because we don't want fruity bits)
30g powdered sugar


1. Sift the flour onto your workspace (I usually work right on my kitchen counter) and make a hole in the middle of the flour. The sugar, salt, egg yolk, lemon zest and the vanilla sugar go in there.

2. Cut the butter into small pieces and evenly distribute around the sides.

3. With your hands, start kneading everything until you have a smooth dough.

4. Cover the dough in clingwrap and put it in the fridge for an hour.

5. Line your baking trays with baking paper and preheat your oven to 200°C.

6. Take the dough out of the fridge and roll it out to about 3 to 5 mm in thickness.

7. Choose cookie cutters in whatever size and shape you want and start cutting out shapes (squares and circles are easiest and make sure you always have an even number of each shape you cut out). Put one half of the cookies on your baking tray like that (those will be the bottom cookies), and use a smaller cookie cutter to cut another, smaller shape out of the other half of the cookies. Those will be the top.

8. Bake for about 8 minutes.

9. After the cookies have completely cooled down, stir the jelly a little, so it's less jelly-like in consistency and easier to spread on the cookies. Spread a little jelly on the bottom cookies (how much depends on the size of your cookies and how much you like), but make sure it doesn't reach the edge.

10. Lightly press one of the cookies with the cut-out shape on top.

11. Dust with powdered sugar.


Enjoy!
♥ Nicole